
Tonkotsu Ramen At Home
Tonkotsu Ramen At Home
-
-
-
-
-
Tonkotsu Ramen At Home
-
Post #1 - January 20th, 2011, 2:21 pmLTH,
I've been mourning the loss of Kitakata in my own way; that is, by raiding Santouka on a twice-weekly basis. After realizing that I couldn't keep up such a frenetic pork-and-noodle intake, I turned to dedicating a majority of my available cooking time to developing a decent tonkotsu ramen. Starting with the noodles, David Chang's noodle recipe is pretty good:
(paraphrased from the momofuku book)
800g bread flour
300g h20
8g alkaline salts
But I still didn't have a good recipe for chashu.
That is, until now.
This, then, is as close as I've come to mimicking the wonderful, achingly rich toroniku (AKA "special pork"). From what I can tell, Santouka uses pork cheek. If you can't find whole pork cheek, you can use pork belly. Don't follow my mistake of trying to use bits of cheek meat.
(recipe adapted from takethoufood.com)
Ingredients:
2 lbs. WHOLE pork cheek or pork belly, skinned
1 C. shoyu
3/4 C. sake
1/2 C. mirin
1/4 C. water
8 cloves garlic, peeled
2" knob ginger, peeled
1 Tbsp toasted sesame oil
2 Tbsp white miso
The method is fairly straightforward. Combine the ingredients in a medium-sized pot and bring to simmer while prepping the pork. Add pork, then simmer, covered, for 1-2 hours, rotating top/bottom every 30 minutes or so for evenness. Rest for at least 10 minutes, then carve or refrigerate.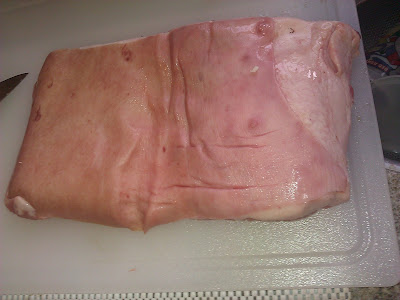
2 lb. slab, pre-skinning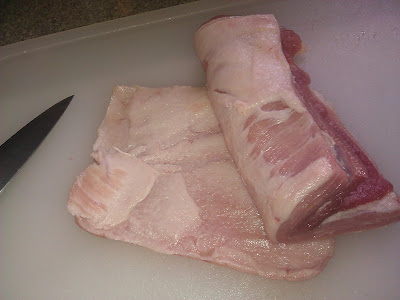
2 lb. slab, skinned and halved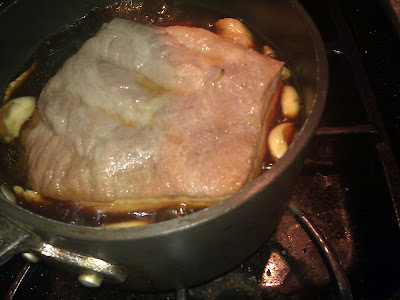
1 hour down.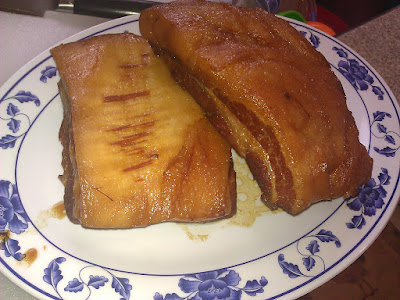
Time for a rest.
Carving the first slices.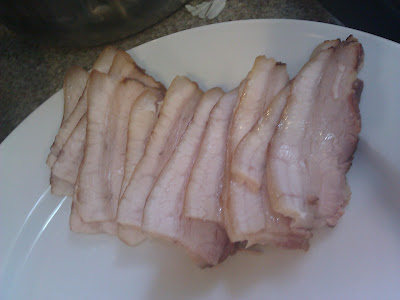
Carvings from the second slab.
Next stop, tonkotsu broth!
-s.Last edited by Sherman on May 4th, 2011, 9:04 pm, edited 4 times in total.
-
-
-
Post #2 - January 20th, 2011, 3:28 pmThanks for this! I will be following this thread very, very closely. I would gladly have a bowl of their miso ramen with pork (no 54?) as a last meal.
Where did you get such lovely pork?Coming to you from Leiper's Fork, TN where we prefer forking to spooning.
-
-
-
Post #3 - January 20th, 2011, 3:48 pmI'm fortunate enough to call Fresh Farms my neighborhood grocery. Their meat department has procured, on various occasions, brisket (point and flat), whole pork belly, pork shoulder bones, boston butts, and halal lamb quarters as well as offering Miller Farms chickens and pretty darn good seafood and produce sections.
They have everything but the brand of white miso that I like. For that, there's Super H-Mart, just a quick 5 minute drive away.
-s.
Fresh Farms Market
5740 West Touhy Avenue
Niles, IL 60714
Super H-Mart
7801 N Waukegan Road
Niles, IL 60714
-
-
Post #4 - January 20th, 2011, 3:57 pmKevin Pang's Cheap Eats in the Trib also raved about Santouka today (can't find it online).
That pork looks lovely, though, and less work and mess than Chang's belly process.
One question: is "1 Tbsp sesame" seeds or oil? I'm guessing the latter.What is patriotism, but the love of good things we ate in our childhood?
-- Lin Yutang
-
-
Post #5 - January 20th, 2011, 7:38 pmJoelf, thanks for the correction. I've edited the original post for clarity.
If/when anyone tries this recipe, I'd be curious to hear your thoughts to see how close this gets, and whether there are any additional tweaks.
-s.
-
-
Post #6 - April 26th, 2011, 10:27 pmPreparing for a larger gathering, I started looking for quantities of pork bones beyond the 1 lb. pack of neck bones that can be found at some local groceries. After several misses, I landed at The Butcher and Larder, where they happily sold me 12 lbs. of bones and trotters. I took further advantage of their stock and picked up a couple of jowls. A bit pricey, but good value for the quality (and scarcity) of the meat. When selecting bones, I've found that the trotters offer a goodly amount of collagen, and shank bones contain yummy bits of marrow. Having these things makes a world of difference.
I've found several variations online, and after a little tweaking have settled on the following recipe. I don't believe that my method has been exactly described, so this will contain all of the steps:
Tonkotsu Broth
Yield: 2 gallons
Ingredients:
10 lbs pork shank, back and neck bones
3 trotters
3 Tbsp. lard
1 large onion, fine dice
8 cloves garlic, coarse chop
1 knob ginger, 2" long, coarse chop
1 tsp baking soda
Equipment:
12 qt or larger stock pot
Small (1.5 qt) sauce pan
Skimming device
1 clean sink basin
Optional:
Electric kettle
Additional large pot or dutch oven
If desired, use these devices to keep larger quantities of near-boiling water ready to shorten cooking time.
If at all possible, have your butcher cut all of the bones into small (2-3" long) pieces.
We Want Clean Bones:
Add bones to stock pot, then cover with water. Bring pot to rolling boil, then back off to maintain a medium boil. Scum and blood WILL accumulate; skim aggressively until accumulation slows down, about 10 minutes. Dump pot and contents into sink. Rinse the bones under running water to remove any stubborn bits of blood. Rinse and scrub the stock pot.
The (long) Main Event:
Refill the pot with the squeaky-clean bones, cover with water, and bring to boil. Just like last time, back off a little to maintain a medium boil. For the next 7 hours, keep the boil going, adding water as needed to keep the bones covered. This is where the milky, opaque color is developed; a stark contrast to the classic French stock technique. Drop a dime in the bottom of the pot here, and you won't know that it's missing.
Since I trimmed the jowls, there was a goodly amount of pork fat that was looking for a purpose, so I rendered it and came up with about 8oz. of lard.
Sometime around hour 5, heat lard in the small saucepan over medium heat. When the oil begins to shimmer, add in the onions, garlic and ginger. Sprinkle the baking soda on top (yes, I did this after reading Kenji Alt's article on onion dip) and cook to caramelize the aromatics. After the onions have cooked down a bit (12-15 minutes), the mixture should be a light to medium brown. Dump the entire contents, lard and all, into the stock pot.
At hour 7, meat should be falling off bones, and most, if not all, of the collagen and marrow should have dissolved. You now have a huge pot of stock. Using whatever straining device(s) you have, strain it all through.
Congratulations! Now all you have to do is figure out how to get rid of the remnants and cool the stock.
Next step, seasoning the broth.
-
-
Post #7 - April 27th, 2011, 9:06 amThat's certainly a whole lot simpler than Momofuku's broth, which starts with steeping dried shiitakes, discarded (or used to make pickled shiitakes, which I highly recommend), then steeping konbu, discarded, then a whole chicken, discarded, then bacon, discarded, then pork bones. Great broth, yes, but absurd amounts of time and materials.What is patriotism, but the love of good things we ate in our childhood?
-- Lin Yutang
-
-
Post #8 - April 27th, 2011, 10:22 amJoelF wrote:That's certainly a whole lot simpler than Momofuku's broth, which starts with steeping dried shiitakes, discarded (or used to make pickled shiitakes, which I highly recommend), then steeping konbu, discarded, then a whole chicken, discarded, then bacon, discarded, then pork bones. Great broth, yes, but absurd amounts of time and materials.
I don't know that the chicken adds a whole lot to it, but can say that I've tried it using chicken backs/wing tips in addition to the pork bones, and I couldn't tell the difference. My standard chicken stock, derived from CI, makes heavy use of backs and tips, but my understanding of the benefit is that chicken bones contain more collagen per unit of weight than pork or beef bones, and it is for this reason that I add the trotters in lieu of Foghorn Leghorn. I brown the aromatics in lard to add a touch of sweetness and some complexity.
Regarding shitake and kombu, they add some glutamic acid which boosts the umami, but these can be added after the bone-wringing process with little change to the finished product, IMHO.Last edited by Sherman on April 28th, 2011, 9:26 pm, edited 1 time in total.
-
-
Post #9 - April 28th, 2011, 9:23 pmNow that we have a nice, healthy amount of stock, the doctoring begins.
As meaty and fatty as it is, there are a few touches that really round out the flavors. I start with salt, white miso and
kombu. The salt adds pure salinity without any other flavors. Seems obvious, but I came to this realization only AFTER trying other methods to add salt (soy sauce, miso, salt pork) that added unwanted accents. White miso adds a little fermented funk without changing the color of the stock. Kombu is an absolute necessity; you won't get that same umami hit without it.
Bring the stock to a gentle boil, then add salt and miso. Whisk to break down the miso, then add 5 pieces of 2" x 2" kombu per half-gallon of stock. Cover and maintain a gentle boil for 10 minutes, then remove the kombu. Taste, then add another 5 pieces/10 minutes if you feel like you need more umami. Add 1 tablespoon of rendered fat per quart of stock, then cover and keep warm for serving.
At this point, I'll add a little toasted sesame seed and some scallions, but that's about it.
JoelF mentioned the mushroom/chicken/bacon additions per Momofuku. I've had enough success with this method that it has satiated my curiosity for alternative methods.
-
-
Post #10 - April 29th, 2011, 8:24 amThe other doctoring that Momofuku mentions is last-minute addition of tare.
The only commercial tare I've been able to find is listed as for eel sushi, and it's pretty much McDonalds-level teriyaki dipping sauce: no flavor except sweet and salt, and not even much of those. He's got a recipe, but I wasn't willing to invest the time -- perhaps I should have.What is patriotism, but the love of good things we ate in our childhood?
-- Lin Yutang
-
-
Post #11 - May 4th, 2011, 9:36 pmTime to elaborate a little bit on the ramen noodle itself. As mentioned on the top post, I've had some success with David Chang's ramen recipe, but the actual rolling/cutting process can be simplified dramatically.
To get this: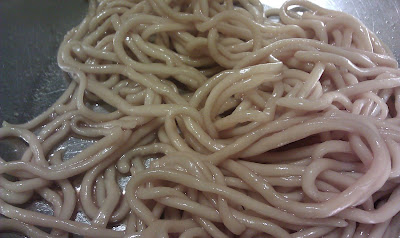
Ramen, shoyu, chili oil, white miso paste
I took Chang's ingredients and method verbatim. Knead for a few minutes, rest for a bit longer, then roll out. My Kitchenaid is the smaller flip-top model, but it provides sufficient power to roll through this noodle dough. If you follow the Momofuku recipe, you'll end up with roughly 1.2kg of product. The book recommends 6-8 servings, so I split the difference and end up with 7 x 170g servings, a healthy entree for most.
If you refrigerate the dough, I strongly recommend portioning out first; this will make life easier.
Rolling
Start with a single 170g portion. Split roughly in half, then press flat with the heel of your hand. Set rollers to 1 (widest) and pass the dough through. For the next 3 passes, set the rollers progressively finer (2, then 3, then 4). After the 4th pass, double the dough lengthwise, make another pass, and double the dough again. At this point, the dough should be as wide as the rollers, if not a bit wider and with one short edge being relatively straight. I haven't found this to be detrimental, but YMMV. Set rollers to 5: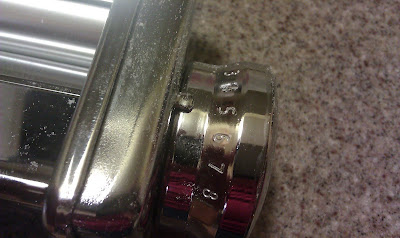
Then make the final pass, feeding the flat edge first. At this point, you may want to cut the dough in half lengthwise to make it more manageable. I prefer the shorter length (~9") in the bowl.
Cutting
I used the spaghetti cutters:
Make sure you have a medium-sized bowl under the cutters to catch the output . Align the flat edge, then feed through cutters. This is when I usually wrap each portion in saran and toss it in the freezer. It keeps for a week or so, but I haven't had enough willpower to let it sit any longer.
Cooking
Prepare at least 3 qts. of boiling water and cook only one portion at a time. These noodles release an incredible amount of starch, and will boil your pots over faster than you can blink. For multiple portions, use multiple pots. Yes, it's OCDish, but if you've gone this far, this should be a minor inconvenience. Cook noodles for approximately 150 seconds (2.5 minutes), then remove from cooking water.
Now, the important step. Rinse the noodles under cool water. A lot of surface starch is still clinging to the noodles. We want to remove this starch and also stop the cooking. Once rinsed, drain the noodles and they're ready for the bowl.
I'll add another post later with full noodle-cooking and bowl assembly, but everything else is here now. Whew!
-
-
Post #12 - May 5th, 2011, 8:49 amOut of curiosity, where did you get the alkaline salts from?What is patriotism, but the love of good things we ate in our childhood?
-- Lin Yutang
-
-
Post #13 - May 5th, 2011, 7:38 pmJoelF wrote:Out of curiosity, where did you get the alkaline salts from?
I procured 1 lb. quantities of potassium carbonate (potash) and sodium carbonate (soda ash) from www.yourchemicalconnection.com.
-
-
Post #14 - May 5th, 2011, 7:54 pmNow for the lurid ramen pics:
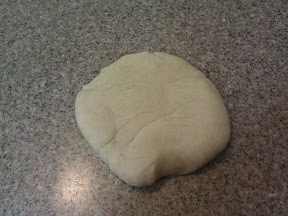
170g of ramen noodle dough, ready for rolling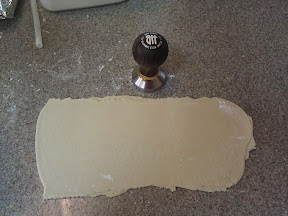
After first pass
After pass 2
After pass 3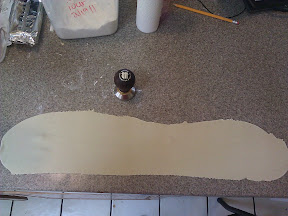
After pass 4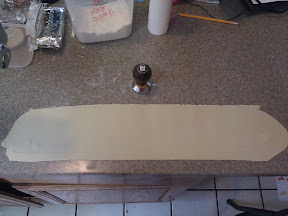
After pass 5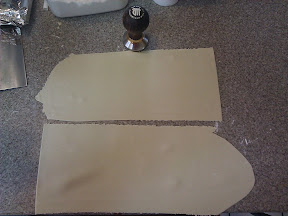
Halving the dough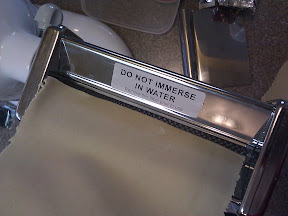
Lining up the flat edge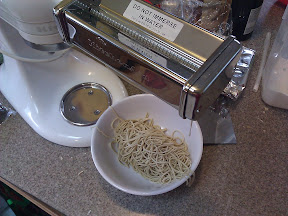
After cutting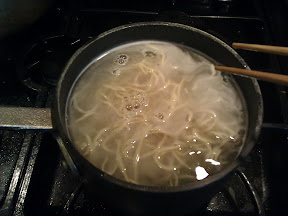
90 seconds remaining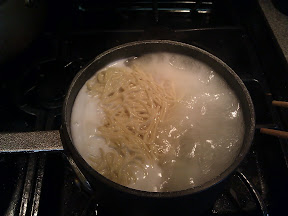
15 seconds remaining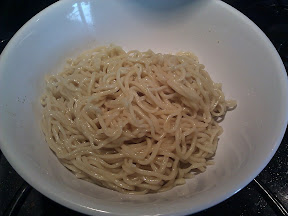
Drained and ready for broth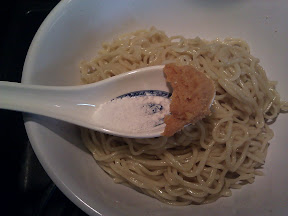
I ended up doubling this amount of salt and white miso
Cutting the special pork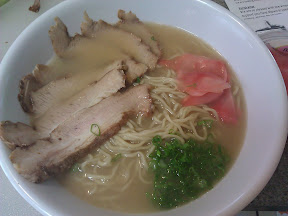
Final assembly. Ramen, pickled ginger, green onion.
Lunch is served.
-
-
Post #15 - May 5th, 2011, 8:24 pmSherman wrote:JoelF wrote:Out of curiosity, where did you get the alkaline salts from?
I procured 1 lb. quantities of potassium carbonate (potash) and sodium carbonate (soda ash) from www.yourchemicalconnection.com.
Yeesh. Could you spare a couple dozen grams at a future LTH event? I'll bring bottles, I could even bring spare bottles for other people, if you're willing to distribute.What is patriotism, but the love of good things we ate in our childhood?
-- Lin Yutang
-
-
Post #16 - May 5th, 2011, 9:13 pmNickel bags, man...

No problem there. Figure that each batch takes 8g, and 1 lb = 450g, I have plenty to spare. I'll bring the salts and a gram scale, you bring the baggies and we can distribute out to whomever is interested.
-
-
Post #17 - May 5th, 2011, 11:21 pmTruly impressive effort. I'm in awe. I hated losing Kitakata, too, but all I managed was to sulk whenever I drive past the place it used to stand."All great change in America begins at the dinner table." Ronald Reagan
http://midwestmaize.wordpress.com
-
-
Post #18 - May 6th, 2011, 11:27 am
Who is going to have their camera ready for when the cops bust this year's summer picnic?Sherman wrote:I'll bring the salts and a gram scale, you bring the baggies and we can distribute out to whomever is interested.
-Dan
-
-
Post #19 - May 22nd, 2011, 6:55 pmThis is extremely impressive. I'll be trying this coming Saturday to replicate the tonkotsu ramen found at these links:
ramen noodles
tonkotsu ramen soup base
topped with
santouka style cha-shu
Do you know if Mitsuwa out in Arlington Heights sells whole pork cheek? Might have to stop by Santouka there for, uh, comparison purposes.
-
-
Post #20 - May 23rd, 2011, 2:28 pmI've hunted and found that Mitsuwa offers sliced jowl, but not whole. Then again, I didn't get the sense that my questions and wild gesticulations (touching my cheek and going "OINK OINK") were much appreciated by the staff
 .
.
I get bones and jowl from the Butcher and Larder, but imagine that Peoria Packing might have some.
Good luck with your efforts! I reviewed the norecipes.com site as I was working on this, and made some changes based on some of the issues that I encountered:- I didn't find kansui. Found the components online, got ratios from Momofuku.
- Measuring by weight, not volume, will improve consistency of noodle output.
- Rinsing matters. If you don't rinse, extra starch will make the noodles gummy and will change the consistency of the broth.
- Flavoring the stock - chicken bones didn't hurt, but didn't add much.
- Caramelized aromatics, however, are huge. Dumping the whole thing in (oil and all) while the stock is still bubbling, halfway through, adds lots of flavor. I skim and save the fat/oil for later use in the bowl. Also, heat the oil before adding to the bowl. This gives the oil porky and aromatic flavor reinforcement to the broth.
- Trying to appeal to non-spicy eaters, I left out white pepper.
As far as amounts and output (2-3 qts. vs 8 qts.), norecipes.com seems much more reasonable.
Hope you report back with success (and pictures!).
--
The Butcher and Larder
1026 N. Milwaukee Ave.
Chicago, IL 60642
-
-
Post #21 - May 23rd, 2011, 3:12 pmpoq wrote:Do you know if Mitsuwa out in Arlington Heights sells whole pork cheek? Might have to stop by Santouka there for, uh, comparison purposes.
H-Mart (Oakton and Waukegan in Niles) is more likely -- they have an amazing array of meats that I keep meaning to explore.
Assi Plaza (Milwaukee between Dempster and Ballard, also Niles) is nearly as good, and has a butcher behind a counter who may be able to accomodate requests.
I remember a note from one of the FoodTV chefs that whole jowl (for guanciale so it was probably Mario Batali) is hard to come by because USDA inspectors will slash the (usually unused) jowl to look for parasites.What is patriotism, but the love of good things we ate in our childhood?
-- Lin Yutang
-
-
-
Post #22 - April 19th, 2013, 8:11 amI'm making roast duck ramen this weekend. I think I'm set on my ingredients for the broth:
Chinese roast duck and duck bones
Some dried seafood - (scallops, small sardines)
Kombu
Ginger
Garlic
Leeks
Here's my question, though: how do I make the tare? I haven't found any good tare recipes online. As I understand it, tare, which generally comes in three forms: shio (salt), shoyu (soy sauce) and miso (miso), is combined with the broth after the broth has been cooked, just prior to serving with the noodels, meat, etc.
Any advice? I think I want a shoyu or shio tare so the broth is not too heavy. Does anyone have experience with this. Am I a complete dolt for making duck ramen to begin with?
Thanks thanks."By the fig, the olive..." Surat Al-Teen, Mecca 95:1"
-
-
-
Post #23 - April 19th, 2013, 9:06 amHabibi wrote:Here's my question, though: how do I make the tare? I haven't found any good tare recipes online. As I understand it, tare, which generally comes in three forms: shio (salt), shoyu (soy sauce) and miso (miso), is combined with the broth after the broth has been cooked, just prior to serving with the noodels, meat, etc.
From Momofuku (David Chang):
2-3 Chicken backs, or bones and skin from 1 chicken, cut into small pieces to maximize surface area for browning
1 cup sake
1 cup mirin
2 cups light soy sauce
Pepper
1) Roast bones at 450F in a large saute pan for 40-60 minutes. Goal is lots of fond, which is why you're using the saute pan. Get lots of browning but don't let it burn.
2) On the stovetop, deglaze with sake on medium-high
3) Add the rest of ingredients, turn to high BTBRTS -- simmer one hour.
4) Strain and add fresh black pepper
The only commercial tare I've found (I've only looked at Assi plaza; Mitsuwa likely has others) was labeled for eel, and is basically caramel-colored sugar and salt, basically flavorless. I'd be interested to hear what you end up with.What is patriotism, but the love of good things we ate in our childhood?
-- Lin Yutang
-
-
-
Post #24 - April 19th, 2013, 9:31 amThanks!
What is the tare/broth ratio you use for the finished soup?"By the fig, the olive..." Surat Al-Teen, Mecca 95:1"
-
-
-
Post #25 - April 19th, 2013, 10:21 amHabibi wrote:What is the tare/broth ratio you use for the finished soup?
Again, from MomofukuDavid Chang wrote:9. In either case finish the broth by seasoning it to taste with tare. Some days the salt of the bacon, or the seaweed, or whatever, comes out more than others. Only your taste buds can guide you as to the right amount of seasoning; start with 2 or 3 tablespoons per quart. Taste it and get it right.
I made his ramen broth, and it's a bit of a salt bomb, mainly from using a pound of bacon in six quarts of water (plus 4 lbs chicken, 5 lbs pork bones, 2 cups shiitakes, etc.), plus anything that comes out of the konbu.What is patriotism, but the love of good things we ate in our childhood?
-- Lin Yutang
-
-
-
Post #26 - April 20th, 2013, 10:25 amSo I've been working on my duck ramen since yesterday evening.
I began by making a duck stock with the following ingredients:
Half a Chinese roast duck (char siu) - skin, meat, bones and all
6 Whole green onions, chopped into 2/3 inch segments
A 5 inch, thick stalk of ginger, chopped into medallions
4 slightly crushed garlic cloves
3 medium sheets of kombu
5 large, dried shitake mushrooms
About a half cup of dried Japanese anchovies (not the snacking kind that is covered with sesame seeds and a slightly tangy glaze)
A dash of Japanese Tamari soy sauce (shoyu)
A dash of prepared, concentrated a dashi
1) I fried the dry ingredients in the stock pan first for about 15 minutes. The rendered fat from the duck obviates the need to add oil. Brown the ingredients slightly.
2) I added about 2 gallons of water (I'm really not sure about this - I used a large stockpot. Use your judgment).
3) I let everything simmer for about 5 hours. I skimmed a bit, but not a lot of gunk floated up.
4) I strained the stock, which was rich and flavorful, but not salty - the Tare will season the broth later. Squeeze the solids in your strainer to extract all of the wonderful juices and fat.
5) I separated the meat and skin from the other solids. I used the now shredded meat to season the Tare.
6) I mixed the meat with about 10 ladles of broth, 2/3 of a cup of soy sauce, a dash of dashi, and abotu 1/2 cup of sake.
7) Simmer the tare mixture for 40 minutes. The meat will infuse the tare with a VERY intense duck flavor. Strain the meat and any other remaining solids out of the tare, again squeezing the meat to extract flavor. The remaining tare will be salty, and super duck-y. I added a small spoon of red miso at this point.
9) We will mix the broth with the tare to create the ramen. Again, the tare flavors the broth by adding salt and intense duck flavor. I'm eating this tonight, so I'll update later (with pictures).
Have a great Saturday!"By the fig, the olive..." Surat Al-Teen, Mecca 95:1"
-
-
-
-
Post #27 - April 20th, 2013, 11:30 amHabibi wrote:So I've been working on my duck ramen since yesterday evening.
I began by making a duck stock with the following ingredients:
Half a Chinese roast duck (char siu) - skin, meat, bones and all
6 Whole green onions, chopped into 2/3 inch segments
A 5 inch, thick stalk of ginger, chopped into medallions
4 slightly crushed garlic cloves
3 medium sheets of kombu
5 large, dried shitake mushrooms
About a half cup of dried Japanese anchovies (not the snacking kind that is covered with sesame seeds and a slightly tangy glaze)
A dash of Japanese Tamari soy sauce (shoyu)
A dash of prepared, concentrated a dashi
1) I fried the dry ingredients in the stock pan first for about 15 minutes. The rendered fat from the duck obviates the need to add oil. Brown the ingredients slightly.
2) I added about 2 gallons of water (I'm really not sure about this - I used a large stockpot. Use your judgment).
3) I let everything simmer for about 5 hours. I skimmed a bit, but not a lot of gunk floated up.
4) I strained the stock, which was rich and flavorful, but not salty - the Tare will season the broth later. Squeeze the solids in your strainer to extract all of the wonderful juices and fat.
5) I separated the meat and skin from the other solids. I used the now shredded meat to season the Tare.
6) I mixed the meat with about 10 ladles of broth, 2/3 of a cup of soy sauce, a dash of dashi, and abotu 1/2 cup of sake.
7) Simmer the tare mixture for 40 minutes. The meat will infuse the tare with a VERY intense duck flavor. Strain the meat and any other remaining solids out of the tare, again squeezing the meat to extract flavor. The remaining tare will be salty, and super duck-y. I added a small spoon of red miso at this point.
9) We will mix the broth with the tare to create the ramen. Again, the tare flavors the broth by adding salt and intense duck flavor. I'm eating this tonight, so I'll update later (with pictures).
Have a great Saturday!
Can't wait for your update. Seriously considering this as my project for the weekend. Inspiring "Knowledge is knowing a tomato is a fruit; wisdom is not putting it in a fruit salad." Miles Kington
-
-
-
-
Post #28 - April 21st, 2013, 11:10 am

Here's the finished product. I added sweet corn, blanched spinach, bean sprouts, menma (bamboo shoot pickles), nori (dried seaweed), and a perfectly molten duck egg (honjuku). No meat, the broth was rich enough. Though if I were going to add some meat, it would probably be more roast duck, or perhaps a mirin/soy/sake marinated, seared and sliced duck breast.
We used store-bought fresh thin ramen noodles (not dry).
This was an excellent experiment. I'll be doing this again, perhaps with pork or chicken next time."By the fig, the olive..." Surat Al-Teen, Mecca 95:1"
-
-
-
-
Post #29 - January 27th, 2020, 6:22 amNecro bump time. Did a homemade tonkotsu ramen project this weekend that finally turned out good, after at least a couple lackluster and poorly researched prior attempts over the years.
Broth was nothing out of the ordinary, just a large package of pig feet (approx 4 lbs), neck bones, and chicken feet (all purchased at fresh farms). A proper hard blanching is the real key here IMO, after bringing to a rolling boil, I think you need to let it go a full 5+ minutes before draining and washing. Any less and you're just not going to get the clean, white broth you're looking for. After blanching I kept at a rolling boil for a solid 10 hours during the day Saturday. I kept a kettle on the stove in order replenish hot water as needed and ended up adding probably a kettles worth of water every hour or so. Resulting broth after straining had the color I was looking for a gelatin for days.
Noodles were done using this recipe on serious eats, proportions were followed exactly although i deviated slightly on process. I divided the dough into four portions and fold in thirds instead of half. Ended up being extremely pleased with the noodles which had a ton of chew and were surprisingly easy to work with once I got the hang of things. I cut half the noodles on setting 6 and half on setting 7, honestly can't say which i preferred, they had plenty of chew either way.
Final assembly was a scoop of tare (some random white miso based recipe I worked up but was pleased with) whisked with a couple of broth, followed by noodles, more broth and toppings. Would probably go 7 minutes on the egg next time, these were great but extremely delicate and hard to peel. Again, this is the first ramen i've made that fell into the worth it category for me, especially if you're the type that finds spending a weekend indoors cooking enjoyable. The blanching and noodle knowledge are definitely going to be put to use on future experiments.
-
-
-
Post #30 - January 27th, 2020, 7:58 amThat looks great!
I've been using Mike Satinover's recipes https://www.reddit.com/user/Ramen_Lord and I can't say enough about how great they turn out. I've made the tonkotsu, miso and chicken shoyu and they're pretty excellent.
The pork broth for the miso has been extra useful in that you can make a large batch and freeze, so making a bowl isn't a whole day process. Here's one of the bowls that I made on Friday night for din.
Also, I've tried making noodles at home and my outputs aren't worth the effort. Instead sun noodle has different options available at mitsuwa and h Mart. Mitsuwa has more varieties of thickness but hmart is closer to me


