Home Cookin’ 6: Ava George Stewart

By Alan Lake (Jazzfood)

ava

There’s no lunch in the Carolinas – just dinner at mid-day and supper in the evening. And for breakfast this holiday season, a menu of shrimp and rice and vegetables mostly grown on a small outer island off the coast, along with stewed blue crabs, fried flounder, and oysters. Welcome to the holidays, Carolina style. In keeping with the season, a feast is in order. And for that, Ava George Stewart has got you covered.

Sporting an enormous smile you can feel and an infectious, vivacious laugh, Ava’s a criminal lawyer who got her Master Gardener’s certification while in and out of court defending bad guys all day long – seamlessly balancing hard science with true crime. She’s a multifaceted person with home cooking in her soul. Living in Chicago with a part of her heart in the South, Ava embodies the spirit of the holidays: sharing.

Read More…

Ava’s Recipes: Ambrosia and Miss Boston’s Pound Cake, a.k.a. Mr. Good Cake

Note from Alan Lake: The ambrosia recipe is from Ava’s mother, and the pound cake recipe is from Miss Mildred Boston. When asked if Ava’s mom would mind me combining the two desserts, Ava said, “She’d think you were gilding the lily, but go right ahead.”

Ambrosia

Ingredients
avaambrosia
4 navel oranges, peeled
1 pineapple
3 ripe bananas
1/2 cup unsweetened coconut
5 oz. of maraschino cherries

Method

1. Cut oranges into 8 sections; make sure the membrane is removed.

2. Slice bananas thinly.

3. Dice pineapple.

4. Start by placing oranges at the bottom of a glass. Alternate by adding a layer of bananas and then a layer of pineapple.

5. Mix in maraschino cherries and top with coconut.

Miss Boston’s Pound Cake, a.k.a. Mr. Good Cake

avamsbostonrecipe
A recipe in Ava’s mother’s handwriting

Ingredients

6 eggs
½ lb. butter
¼ cup Crisco shortening
2 cups  flour
1 cup self-rising flour
1 cup buttermilk
3 cups sugar
1 t. vanilla extract
1 t. lemon extract

Method

1. Preheat oven to 325° Fahrenheit.

2. Mix all ingredients together for 10-15 minutes. Pour batter into a greased and floured tube pan. Bake for 75 minutes.

Ava’s Recipes: Shrimp and Gravy

avashrimp4Ingredients

2 lbs. of medium shrimp, peeled and deveined

¼ cup flour, plus a tablespoon or two

3 T. oil

½ small onion, diced

2-3 cloves of garlic

 Method

1. Pat shrimp dry. Then season them with salt and pepper. Place flour in a bag. Add shrimp and shake to coat.

2. Heat a skillet with oil. Once the oil shimmers, add the shrimp. Cook over medium heat until lightly browned, but still translucent.

3. Remove shrimp from pan. Add onion and sauté until softened.

4. Add flour and garlic to the skillet. Then add 1 cup of hot water. Place the shrimp back into the skillet and cook until done.

4. Serve over rice.

Ava’s Recipes: Hoppin’ John Vegetable Curry

avajohnIngredients

2 T. curry powder

1 ½ t. garam masala

1 large onion, diced

1 lb. sweet potato, diced

3 cloves of garlic, minced

1 T. fresh ginger root, grated

2 rooster spur peppers (or other hot pepper)

1 T. tomato paste

1 bunch of collards, washed, chopped, stemmed, and blanched

1 can diced tomatoes, chopped

12 oz. fresh black-eyed peas

¼ cup coconut milk

 Method

1. Boil 2 quarts of water in a large pot. Add salt and collards. Cook for seven minutes. Drain. Squeeze all of the excess water out. Rough chop. Set aside.

2. Heat small skillet over medium heat. Add dry spices to hot skillet. Shake pan to make sure spices don’t burn. Adjust heat, if necessary. Spices should darken and your kitchen should smell like a marketplace (about 2 minutes). Remove skillet from heat.

3. In large pot (use the same one you used for the collards) heat 3 T. of oil until glistening. Add sweet potatoes and onions; stir to keep them from sticking to the pan. Cook until everything is golden and there are crunchy bits on the sweet potato (approximately 8 minutes).

4. Reduce heat to medium. Make a well in the center of the pan and add the rest of the oil, garlic, ginger, rooster spur peppers, and tomato paste. Stir the ingredients. Add curry powder and garam masala and cook an additional minute (you want the flavors to bind). Add collards and stir until all items in the pot are incorporated with spice.

5. Finally, add diced tomatoes, 1 cup of water, black eyed peas, and salt to taste. Raise heat to a boil, stir the bottom of the pan and loosen all of the browned spices and seasonings from the bottom (this takes a bit of elbow grease). Cook an additional 10 minutes. Add coconut cream and heat through. Serve with rice, or – if you are lucky enough to have some on hand – homemade lime pickle.

An Introduction to Burmese Cuisine

Onur Usmen (turkob)

Yangon 1
Sule Pagoda, Yangon

Myanmar, a country rich in history and tradition, is located at the intersection of India, China, and Thailand. It is famous for its many beautiful pagodas and a unique cuisine that reflects its location, with influences from both the Far East and the Indian subcontinent.

It’s also considered one of the most diverse countries in Asia, in large part because its physical position between such powerful countries has encouraged border migration and culture mixing for over 2,000 years. This means that Burmese cuisine is varied and exciting – but so far, not as widespread here in the U.S. as it should be.

Read More…

Alternative Dining in Chicago

By Kim Campbell (Kimchic)

adrelishnoodle
A handful of creative food venues, designed to throw us out of our comfort zone by highlighting the skill of enterprising new chefs, offering eclectic cuisines, or whisking up anticipation over a new restaurant, help make up the Chicago phenomenon that is alternative dining. 

Pop-up restaurants, supper clubs, underground dining, and Chaos Cooking are among the out-of-the ordinary culinary experiences available to the adventurous Chicago diner. Some of these concepts have been around for decades; some are being reinvented by new chefs to fit modern tastes. They’re doing this by using social media to build hype, by incorporating contemporary concepts (such as using organic and locally-sourced produce), and by adding new twists to older concepts like the potluck.

Read More…

Chef Julia Pham’s Crunchy Garlic Chili Oil

Chef Julie Pham at her underground dining venture, Relish

Ingredients
1 cup oil (Julia likes peanut, but grapeseed oil also works for those with peanut allergies)
1/2 cup red chili flakes
1 T. sugar
1 bulb garlic, minced
1/2 t. salt

Method
1. In a pan, heat 2 tablespoons of the oil on medium-high heat. Throw in the minced garlic and fry until golden brown. Remove from heat.

2. Heat the rest of the oil for 5 minutes. Take off heat, add chili flakes. It will bubble!

3. Allow to cool for 5 minutes. Add sugar, garlic, and salt.

4. Store in a jar and refrigerate for up to 3 months, or serve fresh with soups and noodle dishes.

Home Cookin’ 5: Cool Yiayia

by Alan Lake (Jazzfood)

hc5yiayia61714
Synglitiki “Tita” Zervos comes to the United States in 1961 imagining she’ll live in the White House or a Hollywood mansion. From her tiny island of Kalymnos off the Southern coast of Greece (population 1,500), it seems possible. Based on American movies, her impression of the United States is all presidents and movie stars. Little does she know what lies ahead: a life full of cooking, family, and later – memories.

Read More…

Yiayia Tita’s Robethia tou Fourno (Lenten Chick Peas)

hc5garbanzoswonionsNote from Alan Lake: A Lenten staple that Yiayia calls her island’s best meal (besides whole roasted lamb), these baked garbanzos Kalymnia style were traditionally prepared by each family and then brought to the bakery to be cooked in their oven overnight (for a small fee). After church the next morning, the families would return to pick them up. Same for the lambs.

With her caveat “If I forgot something, it’s not because I don’t want you to know… I forget,” I watched and documented Yiayia’s recipes to the best of my abilities.


Ingredients

4 lbs. canned garbanzo beans/chick peas
1 large onion, peeled, small dice
2 oz. olive oil
3 cloves garlic, chopped
28 oz. tomato sauce
½ can tomato paste
3 vegetable bouillon cubes, crumbled
3 stems parsley, chopped
1 t. pepper
1 sprig fresh rosemary, smashed, chopped

For the onions that top the dish:
3 lbs onions, peeled and julienned
1.5 cup olive oil

Method
hc5garbanzosb4onions

1. Rinse and drain garbanzos in a colander until liquid runs clear.

2. In a 6-quart pot, combine 2 oz. oil, chopped onion and chopped garlic. Stir over high heat until onions start to brown.

3. Add garbanzos, tomato sauce, tomato paste, parsley, garlic, rosemary, crumbled bouillon cubes and pepper.

4. Mix well. Bring to a boil and reduce to simmer for 1 hour.

4. Remove from pot and place in thick metal roasting pan. Preheat oven 375 degrees.

5. Cook the onions that top the dish. Heat olive oil in a heavy bottomed sauce pan. Brown the 3 lbs. of sliced onions in the oil and distribute on top of the garbanzos. Do not mix. Yiayia used most of the oil as well – about a cup’s worth. Place on top.

hc5onions4garbanzos6. Bake for 1 hour covered.

7. Remove cover and turn oven onto broiler setting. Place under broiler to allow onions to crisp up a bit (a couple of minutes maybe). You need to watch this carefully; do not walk away.

8. This makes a great side dish or main course. Serve with a salad of cucumber, onion, feta, and olives drizzled with some red vinegar, good olive oil and salt and pepper to taste. Warm pita bread is nice as well.

Opa!

Yiayia Tita’s Kalymnian Fela (Dolmades)

hc5felawgreeksaladNote from Alan Lake: We may know stuffed grape leaves by their more formal name, dolmades, but Greek peasants/commoners call them fela – a word that means simply “leaves.” There’s a short window of time in May and June when fresh leaves are at their best. Too small, and you can’t stuff them. Too large, and they get tough.

To explain how she knows when grape leaves are the right size, Yiayia makes a fist and then extends her fingers. “Somewhere in between, that’s the best size,” she says. They grow in sandy soil, and once picked can be dried or frozen. Yiayia freezes hers.  
People are protective of the spots where they find them, keeping them secret, as with truffles. We’re in luck. Yiayia picked hers a couple days before we made the dish, and they’re as fresh as can be. A different animal from the bottled, to be sure.

Fela can be vegetarian or contain meat or lamb or pine nuts, depending on your taste. Fela/dolmades are most often eaten on Sundays, but here, any time will do.  


hc5meatmixforstuffingIngredients

1 large soup bone w/some meat still on it, browned and reserved (besides imparting flavor, this helps in preventing sticking or scorching)
3 lbs. ground beef (80/20 works best, you don’t want it too lean)
2 large onions, diced
3 stems flat leaf parsley, coarsely chopped
1 cup long grain rice, washed, drained
2 t. tomato paste
12 oz. tomato sauce
1 t. salt
1 t. pepper

For the avgolemono sauce
2 egg whites
2 egg yolks
2/3 cup fresh lemon juice
1 cup pot juices from fela


Method

hcfelapostblanche1. Mix all ingredients together, including whatever meat you can cut from the soup bone. This adds a different texture to the ground beef mixture. Chill. Moisten meat mixture with a bit of chicken stock or water.  It should be a bit glossy.

2. Prepare fela/dolmades. Ideally, the fela should have been picked fresh in May–June and frozen for year-round use – or, it’s available in ethnic grocery stores by the jar. First, rinse well. Bring water to a boil with the juice of 1 lemon. Add fela to water and blanch for 5 minutes. If they’re still tough, blanch for an additional 5 minutes. Strain and set aside to cool.
 Remove 1/4 inch of the stem, as they can be tough.

hc5felawstuffingc3. Assemble fela. Use a heavy-bottomed pot – 6 quarts at least. Place beef soup bone on bottom of the pot. Open leaves and place stem side on the bottom. Add approximately 1 T. meat mixture to the lower 1/3 of the leaf.  Fold leaf over the filling and then fold in the edges of both sides in, as as you would a burrito or egg roll.

4. Cook fela. Place in pot seam side down, layering tightly around and over the soup bone. Dilute 2 cups water with 4 chicken bouillon cubes, crumbled, and pour over fela in the pot.

 Add 1/2 stick of unsalted butter, cubed. Place a dish over the top to weigh down and cook for 1 hour over medium heat, covered.

hc5felacook5. Before serving, make the the avgolemono sauce.

 In a chilled mixing bowl, beat egg whites until fluffy. Add yolks one at a time and continue to beat.  Slowly drizzle lemon juice in.

6. Add pan juices slowly and adjust seasoning as needed with salt and pepper. Pour avgolemono over the top of the fela and swish the pot around to combine the juices. Reserve some sauce for garnishing once plated. Eat hot or cold. It’s even better the next day.

Heaven and Earth in Xian: Persimmon Cakes and Terracotta Warriors

By Josephine Hyde (Josephine)

persimmoncakesfront

Like most visitors to Xian, China, my husband and I were drawn by the prospect of visiting the site of one of the most significant archeological discoveries of the 20th century: the Terracotta Army of China’s first emperor. What we did not foresee was the remarkable variety of street food that awaited us in Xian’s Hui Muslim quarter. How were we to know that, amid the banquet before us, a humble persimmon cake fried in oil would be the one souvenir we were determined to take home?

Read More…

Recipe: Xi’an Persimmon Cakes – Shi Zi Bing

By Josephine Hyde (Josephine)

persimmon13fruitPersimmons abound in Midwestern farmers’ markets during the fall. One need not travel to Xi’an, nor set aside the practice of locavorism to eat shi zi bing. According to Purdue’s horticulture website, “Mature, hard, astringent persimmons can be stored in the refrigerator for at least a month. They can also be frozen for 6 to 8 months.” Alternatively, one can process the ripe fruit and freeze the purée for up to a year.

To be palatable, most persimmons should be dead-ripe. To hasten the process, wrap the fruit in paper or enclose along with apples or pears to encourage the development of ethylene, the natural ripening agent.

Allow the Hachiya variety to soften and become wrinkly. This mitigates the astringent quality of its flesh. The Fuyu persimmon is sweeter than the Hachiya, and has a complex floral aroma. The Fuyu does not need to be mushy to be eaten. A fresh persimmon weighs about 168 grams.

For an authentic taste of Xi’an, snack on some dried persimmons while you make the cakes. I found dried persimmons in my local Korean grocery, where I asked for gotgam and was directed to the freezer section. The fresh and dried fruits can be found in Japanese groceries as hoshigaki and Vietnamese groceries as hồng khô. Allow the frozen persimmons to stand at room temperature for 20 minutes, and you will find them to be softer than most dried fruit.

persimmon4dishesI adapted both amounts of ingredients and directions from this recipe on the website of Australia’s multi-cultural Special Broadcasting Service.

Ingredients

For the walnut filling:
1/3 c. superfine sugar (I used C&H Baker’s Sugar)
1½ – 3 t.  rosewater (I used Ziyad brand)
1½ t. water
¼ cup finely chopped walnuts

For the persimmon cakes:
1¼ cups (286 g approx.) skinless persimmon purée (see note below for directions)
1½ cups all-purpose flour
Canola Oil

Method

1. Make the walnut filling. Combine rosewater and sugar, adding enough water to form a dryish paste. Toast walnuts over low heat in a small skillet just until you begin to smell them, before they begin to color. Combine walnuts and sugar mixture and set aside.

persimmon2cooking2. Make the dough. Combine persimmon purée and flour in a bowl to achieve a wet, sticky dough such as one for drop biscuits. The dough will look glossy. Cover bowl with plastic wrap and set aside for at least ½ hour in refrigerator.

3. Form the cakes. Very generously flour a board or other work surface. Gather dough from bowl, and drop in one piece onto floured surface. The dough will be very soft, but the additional flour will allow it to be manipulated and fashioned into a log the thickness of a rolling pin, about 2″ in diameter.

4.  With a sharp knife, cut the log into 10 pieces.

5. Form the cakes by gently rolling each piece out into a circle 3 inches in diameter, as you would a dumpling skin. Sprinkle a bit more flour on the piece of dough if necessary to prevent sticking (use the side of a glass as I did, a small rolling pin, or dowel, if you have one.) Press the edges of each round with your fingers to make it slightly thinner at the edges. Depending on how much flour adheres to each round of dough, you may need to wet the edges as you would a dumpling wrapper, in order to close them properly around the filling.

6. Place into the center of each round of dough about ½ t. of the walnut mixture.

7. Enclose walnut filling by bringing edges of dough together in center as you would for a soup dumpling, but without the fancy folds. Press to seal. The cakes will be shaped like little domes at this point. They will flatten as they cook in the oil.

8. Set prepared cakes on floured board. Repeat process with remaining dough and filling.

9.  Fry the cakes, First, pour canola oil into a large skillet over medium-low heat. The level of the oil will rise when you have filled the skillet with the cakes, so start off with about 5/8″ of oil. Heat oil over medium heat.

10. Load a spatula with a single cake. Carefully slide and push cakes off end of a dry spatula with a wooden spoon into hot oil, taking care not to splash. Add more cakes to fill pan. The cakes should not be submerged in the oil; the surface of each cake should be above the oil.

persimmon111. As cakes begin to cook, press them down gently with your spatula. They will slowly turn a beautiful golden orange color.  If they begin to brown, the oil is too hot.  Regulate the heat so that the cakes cook thoroughly but slowly. After about 5-7 minutes, turn each cake with tongs, to cook on the flip side.

12. In another 5-7 minutes, test one cake to see if the center remains light yellow in color, or whether it has darkened slightly to the dark golden shade of the cooked exterior of the cake. This indicates doneness. DO NOT TEST DONENESS BY TASTING NOW! The molten sugar-walnut center will be palate-scalding hot.

13. As cakes begin to look uniformly done, but before they brown, remove to drain on paper towels.  Wait at least 5 minutes, and test for temperature before you eat them.

14. Consume when warm.

Note on Persimmon Purée:

persimmon3bowlTo make 1¼ cups of persimmon purée, purchase 3 Hachiya or 5 Fuyu persimmons. Depending on the size of the fruit, you may have some left over. A medium-size ripe Hachiya persimmon weighs about 168 grams; a Fuyu weighs somewhat less, around 138 g.

Stem and peel the ripe, fresh persimmons. Halve them, and scrape flesh into a bowl, making sure to remove any stubborn bits of skin. Put flesh into processor or blender, and process a few seconds until any lumps are removed. Although there will be some visible fibers, these should not be bothersome in the finished cakes if you have processed the purée in a food processor or blender. However, if you like, strain the purée to eliminate the fibers. You will need 1 ¼ cups (280 grams) of fruit (about 3-5 ripe persimmons, depending on type and size.)

The purée may successfully be frozen without a loss of flavor for up to a year. Though it may darken in color, this will not affect the taste or color of the finished cake.

Josephine Hyde (Josephine) is a longtime contributor to LTHForum.com. She believes that food is a portal to insight, connection, and joy.

In Defense of Deep Dish: Ending the Debate Over What Defines Pizza

By Daniel Zemans (MarlaCollins’Husband)

pizzamalnatis
A bona-fide Chicago-style deep dish pizza from Lou Malnati’s


“They [Italians] would go to Chicago and they would kill themselves if they saw what was going on over there…It has nothing to do with pizza.” – Mario Batali

“It’s very tasty, but it’s not pizza.” – Supreme Court Justice Antonin Scalia

“Let me explain something: Deep dish pizza is not only not better than New York pizza, it’s not pizza. It’s a f***ing casserole!” – Jon Stewart (spoken while using a picture of a stuffed pizza not deep dish as a visual aid)

There’s not actually a serious debate in this country as to whether deep dish pizza counts as pizza. It’s been called pizza since its invention in 1943; it’s universally referred to as pizza and it shares a flavor profile with every other style of tomato sauce-topped pizza. That said, the dissent seems to be increasing. It could just be that New Yorkers are getting even more vocal; it could be part of the move away from traditional red-sauced Italian-American food to more “authentic” Italian options; it could be that more willfully ignorant food writers are craving attention; or it could just be that Jon Stewart really does have that much sway over public discourse. Whatever the reason, now seems like a good time to make clear that the argument that deep dish pizza is not pizza flies in the face of pizza history, linguistics, and common sense. That’s the nicest way I can say that the argument that deep dish pizza is a casserole is complete and utter bullsh*t.

Read More…

Craft Distilling 101 with North Shore Distillery

by Katje Sabin (mamagotcha)

nsdethel
Tucked in a cluster of small industrial buildings between a freeway and a field, amid loading docks and drainage ponds, is a tiny storefront with a half-barrel of herbs and cheerful little holiday lights in front. Just off I-94 in Lake County, about 28 miles north of O’Hare, you’ll find the tasting room and production facility of North Shore Distillery, Illinois’ very first post-Prohibition maker of hand-crafted spirits.

I climbed out of the car and listened to trucks downshifting in the distance, with a counterpoint of small birds happily celebrating the fact that they’ve just survived Chicago’s worst winter in recorded history. I walked across the asphalt under the weak spring sunshine, not sure what to expect: a rickety Rube Goldberg-style tangle of pipes and flasks? Big oak barrels and good ol’ boys in trucker caps and overalls? A brisk and businesslike sterile laboratory? I am clueless, but North Shore Distillery’s co-owner Sonja Kassebaum has kindly offered to educate me in the ways of small-batch distilling, and I’m reporting for my first (and only) day of class.

Read More…

Sonja’s Cocktail Recipes

The following are recipes for cocktail creations by Sonja Kassebaum of North Shore Distillery.

Violet Fizz. Photo Credit: Cory Dewald Photography

Violet Fizz

Sonja created this custom cocktail for the Chicago Botanic Garden’s Orchid & Spirits event in March 2014.

Ingredients

1 1/2 oz. Sol Chamomile Citrus Vodka
1 oz. fresh lemon juice
1/2 oz. Creme de Violette
1/4 oz. simple syrup
Club soda

Method

Shake first four ingredients with ice, strain into a Collins glass filled with fresh ice. Top with club soda and stir briefly. Garnish with a fresh violet, if available, or a lemon curl.

Sol 76

One old-style gin drink is the French 75. Swap the gin for vodka, and you get the French 76. Here’s the North Shore variation.

Ingredients

1 1/2 oz. Sol Chamomile Citrus
3/4 oz. fresh lemon juice
1/2 oz. simple syrup or ginger syrup (1:1)
2 oz. dry sparkling wine

Method

Shake first three ingredients with ice, strain into chilled champagne flute. Top with sparkling wine, garnish with a lemon curl.

BebboBebbo Cocktail

“One of my favorites from Ted’s book,” Sonya noted. She’s talking about “Vintage Spirits and Forgotten Cocktails: From the Alamagoozlum to the Zombie – 100 Rediscovered Recipes and the Stories Behind Them” by Ted Haigh (aka Dr. Cocktail).

Ingredients

1 1/2 oz. Distiller’s Gin No. 6
1 oz. fresh lemon juice
3/4 oz. honey syrup (2:1)
1/2 oz. fresh orange juice
1 dash Angostura Bitters

Method

Shake ingredients with ice, strain into a chilled cocktail glass. Garnish with a cherry.

Nordic Mule

Ingredients

2 oz. Aquavit
1/2 lime
Ginger beer

Method

Squeeze half lime into tall glass; drop remains into glass. Add aquavit, fill with ice, top with ginger beer. Garnish with lime wedge.

Home Cookin’ 4: Ronnie Suburban and Steve Zaransky

By Alan Lake (Jazzfood)

three-amigos
Steve Zaransky, Alan Lake, and Ronnie Suburban

Happening upon LTH Forum was a game changer for me. After nearly two decades, I returned home to Chicago knowing the streets but not what was on them any longer. The city had changed quite a bit in my absence.

A mention of LTH in the Reader (probably by Mike Sula but I can’t remember) teased me with a cut-to-the-chase of like-minded people in all things culinary.  Every weekend for the first year I was back, my sister would show up at my apartment asking “Whattayagot? ” in an accent heard only around these parts. By that she meant, where would we be eating based on my newly gleaned knowledge from LTH discussions the preceding week?  We sampled Thai grocers and Pakistani BBQ, attended a few events, and in so doing met a lot of new people. People I never would have met left to my own devices. While I had old friends here that helped tip the scale to come back, now I have new friends too – many of which who’ve come via LTH.

In reading the forums, certain writing stood out. I found myself laughing and agreeing with some, and shaking my head and wondering with others. The first time I was able to put a face to a name was during the historic Fanny’s debacle of ’06. Having been weaned on Fanny’s, I went in with high expectations. I left feeling I’d experienced an abortion (a.k.a. the meal) without anesthetic. Misery loves company, though, and the company was excellent. That evening I met a couple of people who would become my friends. And then I met more. And more. So it’s safe to say that LTH had significant influence on me (as it has on many that are reading this).  This is but one reason many of us at LTH take this community so personally.

As if we own the damn thing.

But we don’t. Steve Zaransky, Ronnie Suburban and Dave Dickson do. So, I’d like to introduce you to two people (one I met that fateful evening, the other a short time later) that act as caretakers for LTHForum. Steve Zaransky and Ronnie Suburban. Since we’ve fressed so often together over the ensuing years, both in their homes and in the many restaurants found here on LTH, I thought they’d be naturals for this Home Cookin’ series.

Read More…

Home Cookin’ 4: A Conversation with Steve Zaransky

By Alan Lake (Jazzfood)

steve

Alan Lake: Let’s go back to early Steve food memories.  

Steve Zaransky: My dad was in the hotel business, which gave me a lot of exposure – but really, the earliest memories with food were of my mom cooking. I would sit on this little chair in front of the oven window watching choux pastry rise. Like it was a TV. I just couldn’t believe that this was happening in the oven in front of me. I was five or six and totally into watching this. My mom’s a great cook; she cranked out great dinners on a daily basis. She was a stay-at-home mom, who cooked full dinners for the family every night. That formed the memories for what she still cooks today.

Read More…

Home Cookin’ 4: A Conversation with Ronnie Suburban

By Alan Lake (Jazzfood)

ronnie

Alan Lake: Give me some background into your food illness. What started you on your path?

Ronnie Suburban: My dad was a deli man. His first job, when he was 14 – you know when Jews were still on the South Side of Chicago – he was in high school and had a job working at a deli. He loved it! And before that, my grandfather was a kosher butcher. He had a shop on 77th and Jeffery. So it was in the family on that side. My dad wasn’t a particularly well-versed guy with food, but what he loved, he loved to share. I remember certain sandwiches he would make, or certain things he would cook for us…I mean, he had a limited repertoire but certain things obviously meant something more to him.

Read More…

Recipe: Cold-Smoked Salmon Cure

By Ronnie Suburban

Ingredients

lox2 fileted sides of wild salmon, skin-on (total 12-15 pounds net)
500 g. kosher salt
200 g. light brown sugar
400 g. granulated sugar
12 g. white pepper (freshly ground)
6 g. bay leaf (freshly ground)
4 g. mace (freshly ground)
1 oz. rum or vodka
Fresh dill to cover

Method

1. Mix sugars and salt together. Using a coffee or spice grinder, grind the remaining seasonings into a fine powder and incorporate that powder into the sugar/salt mixture. In the bottom of a large, non-reactive container (glass or plastic is best), spread about 25 percent of the cure down to create an even layer.

2. Next, lay the fish down (skin side down) evenly on top of that. Then, sprinkle the rum or vodka evenly over the surface of the fish. Lay the sprigs of fresh dill over the fish evenly, covering its entire surface. After that, use all the remaining cure to cover the fish entirely, patting it gently to make sure no part of the surface of the fish is not covered. Some dill will poke through, which is no big deal.

3. Cover all the fish with plastic wrap, then place a cutting board or other flat surface on top of that to create a press. Place a couple of #10 cans (3-4 pounds of total weight) on top of the press.

4. Place the entire container in the refrigerator and let the fish cure for 24-72 hours. The thicker the fish, the longer it must cure. Small pieces usually take no more than 24 hours. Large pieces can take up to 72 hours. Check after 24 hours and then every 12 hours after that until the fish is cured though. It should still be supple and moist but not raw-feeling.

5. Once the cure is completed, rinse the fish off thoroughly with cold water and dry it off. Place the cured fish on a rack, so it can dry further from above and below, and refrigerate it for 24 hours to create a pellicle, which will help the fish take on the smoke.

6. Once the pellicle has developed, cold-smoke the fish indirectly with apple wood (or other wood of your choice). The smoke should not be above 100 degrees F. as it comes in contact with the fish. If the smoke gets hotter than that, it’ll cook the fish, instead of cold-smoking it. The fish must be kept cold during this process to prevent spoilage. This can be accomplished by smoking only during cold weather, or putting the fish on a rack above a tub of ice.

7. Fish can be smoked for any duration of time, depending on your preference for smokiness. I generally try for about six hours but even two will produce a good, smoky result.

Recipe: Pastrami

By Ronnie Suburban

This one’s based on a recipe from “Charcuterie” by Michael Ruhlman and Brian Polcyn.

zf2012.pastramiIngredients

A 10-13 pound whole brisket, trimmed*

For the Cure:
1 ½ gallons cold water
½ gallon ice water
700 grams kosher salt
14 grams pink salt (this is the amount to use for up to 25 pounds of meat**)
2 T. pickling spice
1 cup brown sugar (packed)
½ cup honey
10 garlic cloves, crushed

Before smoking:
16 grams coriander seeds, lightly toasted
20 grams black peppercorns, lightly toasted

Method

1. Completely dissolve the salts, sugar, honey and pickling spice in 1 ½ gallons of water. Do this over low heat if you have to, but these items will normally dissolve in cold water after some stirring (obviously, some elements of the pickling spice will not dissolve at all). Add the garlic. Stir until combined thoroughly. Add the ½ gallon of ice water to bring the temperature of the cure down. The cure must be cold (38° Fahrenheit or lower) in order for this to work properly and be safe.

zf2012.smokingmeats2. Fully submerge the brisket in the cure. If it floats, you can keep it submerged by placing a non-reactive plate on top of it. Depending on the thickness of the brisket, leave it in the cure for 7-10 days, so that the cure penetrates to the deepest part of the brisket. Or, you can inject the cure into the center of those thick portions of the brisket and reduce the cure time to 3-4 days.

IMPORTANT:  If you used heat to make the cure, refrigerate it until it reaches temperature before adding the brisket.

3. After the brisket has cured fully, rinse it off completely. Pat the brisket dry.  If you have time, place the cured brisket, uncovered – or wrapped in a single layer of cheesecloth – in refrigeration for 24 hours at (or around) 38° F. but do not freeze it. This extra step produces a pellicle, which allows the smoke to adhere to the brisket better. My experience is that it is not really necessary.

4. After the brisket is dry, lightly toast the black pepper and coriander seeds in a dry sauté pan. After they are toasted, grind them coarsely, mix them together thoroughly and rub the entire brisket with the mixture.

5. Hot-smoke the cured, rubbed brisket fat-side down at 200-250° F. for up to six hours over a wood of your choice:  apple, hickory or oak are good ones. If you like it smokier, smoke it long but do not let the internal temperature of the brisket rise above 150° F. If it hits 150° F., remove it from the smoker. The key here is that if the pastrami gets to 150° F too soon, it will not have a lot of smokiness. There really is no downside to smoking it longer (or at a lower temperature) because the final step is a braise, which will cook the pastrami fully if smoking did not get it to that point. Just make sure you do not exceed 150° F. during the smoking process or the exterior of the meat will become dry and desiccated. For restaurant applications, there may be other food-safety regulations that must be followed.

6. After the pastrami has received the desired amount of smoke or reached 150° F., it should be braised before serving. Braising will not only make it extremely tender but will also rid the meat of excess saltiness. I generally braise it for four hours at 275° F. Your mileage may vary.

7. After placing the pastrami in the braising vessel, I fill the vessel about halfway up the brisket with cold water. After about two hours of covered braising, I dump out 90 percent of the water, flip the brisket over, re-fill the vessel again to halfway up the brisket with fresh water, and continue to braise for another two hours. I find that it’s best to braise fat-side-down first and fat-side-up second. The pepper and coriander mix, if applied before smoking, will adhere to the brisket during braising. You’ll lose some of it but not enough to be a problem.

8. After the braise all you have to do is slice (against the grain) and serve.

————–

*Pastrami has an important, defining rub on the outside, so how you trim the brisket before you prepare it is important. You need some fat on the outside to protect it during the smoking process. However, because the fat – which carries the black pepper and coriander – will ultimately be eaten, leaving too much on will result in a fairly unpalatable final product. If you trim the fat after the smoking, you’ll lose the spicy crust that is key to a good pastrami. So, trim the brisket well before curing. I generally try to separate the point from the flat, leaving it attached. I also try to leave about ¼” of fat on the exterior of the brisket.

**This recipe is scalable, depending on how much meat you use. However, the pink salt, which can be dangerous if used in excess, is not as adjustable. Use 1 teaspoon for up to 25 pounds of meat. If you use less than 10 pounds of meat, you might want to consider using even less pink salt.

Recipe: Vegetable Spinach Kugel

By Steve Zaransky (stevez)

stevekugelNote from Alan Lake: The word kugel comes from the German word for ball or sphere. Traditionally it was a round (this is not the case so much any more), baked, sweet or savory casserole made of noodles or potatoes, served as a side dish. In America, traditional kugel was updated to include many variations on a theme. One variation, farfel, consists of small, pellet-shaped pasta and is most prevalent in Ashkenazi Jewish cuisine. Savory kugels may include potatoes, matzah meal, carrots, zucchini, cabbage, spinach or cheese.

Ingredients

10 oz. frozen chopped spinach, cooked and drained
4 T.  canola oil
½ cup matzo meal
5 eggs, beaten
1 cup chopped onion
1 ½ cups grated raw carrots
½ cup chopped celery
½ lb. sliced mushrooms
2 zucchini, grated
1 ½ t. salt
¼ t. pepper

steveveggies

Method

1. Saute onions and all other vegetables in oil (you may need more oil).

2. Add spinach to sauté.

3. Mix everything. Put mixture in a 13″x 9″ pan that has had oil heated in the bottom for five minutes. Bake for 50 minutes or until it looks done.

Braised Short Ribs

By Steve Zaransky

kugelandribsIngredients

6 beef short ribs cut flanken-style
3 T. vegetable oil
2 sprigs rosemary
6 sprigs of thyme
2 bay leaves
1 celery stalk, halved
3 medium carrots, peeled and cut into 1” pieces (for the braise)
3 medium carrots, peeled and cut into ¾” pieces (to serve – optional)
1 large onion, roughly chopped
4 shallots, sliced ¼” thick
6 clove sof garlic, peeled and cut in half
3 T. tomato paste
3 T. flour
1 bottle of full-bodied red wine
6 cups of veal stock or chicken stock (enriched with demi-glace, if possible)
6 red potatoes, peeled
6 prunes (optional)
salt and pepper

Method

1. Preheat oven to 325° F.

2. Season the short ribs generously with salt & pepper.

3. Put the thyme, rosemary and bay leaves between the two halves of the celery stalk and tie into a bundle with twine.

steveribs4. Heat the oil in a large Dutch oven over high heat until the oil starts to smoke, then brown the short ribs well. You will probably have to do that in two batches. Be sure to pour off most of the fat between batches. Remove the short ribs and set aside on a plate. Optionally, you can brown the short ribs over a charcoal fire instead of the Dutch oven to add a smoky note to the dish. That’s what I usually do.

5. Lower the flame to medium and add the tomato paste, cooking for a few minutes until it mellows out and mixes with the oil. Add the onion, the 1” carrot pieces, shallots and garlic to the Dutch oven and sauté until the onion softens and starts to brown slightly.

6. Add the flour and stir well to combine. Cook the flour for two minutes, constantly stirring; add the wine and the celery herb bundle. Raise the heat back to high and cook until the liquid is reduced by a third (20 – 25 minutes).

7. Return the short ribs to the pot, stacking in two layers, if necessary. Add the stock, optional prunes and a little salt (about a teaspoon). Be sure short ribs are completely covered by the stock. If not, add enough water to cover. Bring to a simmer, cover the Dutch oven and transfer to the oven for three hours.

8. At the one hour mark, add the potatoes to the Dutch oven and continue to cook. The short ribs are done when the meat is fork tender and falling off the bone.

9. Transfer the ribs and potatoes to a platter, and then strain the braising liquid through a sieve or fine mesh strainer. Discard the solids. Skim the fat from the braising liquid and return it to the cleaned Dutch oven or a medium saucepan.

10. Bring the liquid to a strong simmer and reduce by a little more than half (approx. 1 hour). Add the optional ¾” carrots at the 20 minute mark. Return the short ribs and potatoes to the pot and simmer for 10 minutes to reheat for service.

2014 Great Neighborhood Restaurants and Resources Have Been Chosen!

By Onur Usmen (turkob)

Maricos el Veneno
Mariscos El Veneno

I am thrilled to announce LTH Forum’s Great Neighborhood Restaurants and Resources (GNRs) Class of 2014.  This year’s class features unprecedented geographic diversity to go along with our regular diet of culinary diversity.

Presenting: 2014 GNRS

As we celebrate LTH Forum’s tenth anniversary (this is only the ninth class of GNRs, since there were no awards in 2010), the GNR program continues to represent all that makes the board so special. The spirit of the community leads us to restaurants and shops where we can interact directly with the people who dedicate themselves to producing great food as enthusiastically as we seek it out and post about it for all to enjoy. This year’s class embodies that spirit and continues to make the GNRs the best resource for anyone seeking great food in Chicagoland.

Read More…

The View from The Other Side: Chefs

 By Kari Lloyd (apopquizkid)

Photo "Chef flame" by JWolff-STL | CC BY 2.0
Photo “Chef flame” by JWolff-STL | CC BY 2.0

Back in my youth, approximately another lifetime ago, working in restaurants was one of the many ways I earned my keep. I did everything from dishwashing to waitressing and working on the line in the kitchen. I also cooked in my own restaurant just outside of London, sharing the stove with a fair few entertaining individuals. Once restaurants are in your blood, getting out can feel a little like a betrayal. Or detox.

Years later, though I now make my living as a laugh-in-the-face-of-death freelance writer, a healthy portion of my friends are still in the trade. A favored post-work activity for restaurant lifers is the post-work bitch session, where they’re all too willing to share, in hilarious detail, the day’s problems, customers and the little complaints that irk them on a daily basis. Despite my time in the restaurant game, most of the stories still frankly amaze me.

While the customer-facing branch of this army, the servers, get a lot of coverage regarding the bothersome properties of the great dining public, the chefs don’t. I began to wonder what diners do that might make a chef blind with rage  – or even just ever-so-slightly annoyed. Seeing as I’ve been out of the life for so long, I spoke to many chef pals and asked that question, and while everyone had their own stories and irritations, there were a few overriding themes that nearly all mentioned.

Read More…

Home Cookin’ Part 3: Robert Smyth

hc3robt

Editor’s Note: This article is the third in a series by Alan Lake, all about home cooks, their stories and recipes. Read part one here for a description of what Home Cookin’ is all about.

Once upon a time in a restaurant in Palm Beach, a manager came back to the kitchen, saying to me, “You’ve got to meet this guy out there. What an ass, getting all bent out of shape over nothing. He reminds me of you.”

Our high-rolling two-top, consisting of a man and his wife, had ordered some vintage port (a Fonseca ’77) after their meal. In walking it over to pour it tableside, my manager friend inadvertently shook the bottle, which disturbed the sediment, thus serving them glasses filled with it. So the man busted her on it, and rightfully so. She came and got me to smooth things over, and he and I have been friends ever since. At the time, none of us knew that this is a guy that knows his sh*t – that’s lived high and low, through good and bad, all over the world.

Read More…

Recipe: Roast Goose with Chestnut-Sausage Stuffing, Roasted Potatoes, and Gravy

By Robert Smyth

Alan Lake’s note: 

This dish was reproduced by Robert later in his life; the goose, stuffing, and gravy are inspired by Julia Child, but he gave it his own spin. 


PART ONE: Chestnut and Sausage Stuffing


Ingredients
1/2 cup of very finely-minced shallots
2 T. butter
1/2 cup real madeira (not sh*tty cooking madeira – Alan’s note: Robert’s wife, Manuela, is Portuguese, which I’m pretty certain is the reason for this comment)
3/4 lb. lean veal
3/4 lb. filet mignon
1/2 lb. pork fat
2 lightly-beaten eggs
1 1/2 t. salt
1/8 t. fresh-ground black pepper
1 large pinch of allspice
1/2 t. chopped fresh thyme
1 clove of garlic, chopped and smashed with the side of a knife
1 1/2 lbs. drained, peeled, French unsweetened chestnuts
1 liver from the goose


Method
1. Finely ground veal, filet and pork fat together.

2. Sweat shallots in butter, using a skillet on low heat, until translucent.

3. Add the madeira, reduce by half and scrape the mixture into a large mixing bowl.

4. Add the eggs, salt, pepper, allspice, thyme and garlic, and mix well until the mixture is light and smooth.

5. Sauté a small amount and taste. Add whatever else you feel it needs to suit your palate. Adjust seasoning as needed (I add cayenne pepper and more salt). Reserve.

6. Take the liver from your goose, chop it fine, and sauté it in butter. The mix of pork fat, veal, and beef becomes your sausage.

7. Add the goose liver and the chestnuts to four cups of the stuffing, and mix thoroughly.

PART TWO: Cooking the goose

hc3cookedgooseIngredients
12-14 lb. fresh goose
1/2 t. salt
boiling water
1 uncoated sheet pans with 1/2-inch rim

Method
1. Clean the cavity of the goose, reserving the giblets and neck for the sauce, and the liver for the stuffing. (Please note, this can be done the day before if you wish to make the sauce in advance; see Part Three for instructions).

2. Season the goose cavity with salt.

3. Starting with the meat stuffing, loosely pack alternate layers of stuffing and chestnuts into the goose. Leave about an inch gap at the rear of the goose.

4. Sew the openings up at both ends. Truss the legs and wings of the goose securely.

5. Prick the skin of the goose all over so that its fat can exit during cooking.

6. Preheat the oven to 450° F. Set one tray close to the bottom of the oven. Leave enough room on the top for a similar-sized dish, which will hold the roasted potatoes (see Part Four).

7. Dry the goose thoroughly and place it breast up in the tray.

8. Have a basting bulb and a serving spoon handy. Make sure to also boil a pot of water on the stove top.

9. Cook the goose in the oven for 15 minutes at 450°.

10. Turn the oven down to 350°. Turn the goose onto its side. If it tends to topple over, jam a wooden spoon underneath the goose to hold it firm.

11. Total cooking time will be about three hours and 15 minutes, plus or minus 15 minutes.

11. Every 15 minutes during cooking, drain the fat from the tray and save it for another use. Note: You may get up to two quarts of fat during cooking.

12. Baste the top of the goose with 3 T. of the boiling water.

13. After 45 minutes, turn the tray 180 degrees to take account of any oven temperature variations.

14. After 1 1/2 hours, turn the goose onto its other side.

15. At 2 hours 15 minutes, rotate the tray 180 degrees again. Also, you should start the water for the roasted potatoes now.

16. At three hours of cook time, start testing the temperature of the goose. It is ready when the goose registers at 180°. Do not overcook; the goose will dry out.

17. Let goose rest for 15 minutes before carving.

PART THREE: Sauce for the Goose

Ingredients
1 1/2 cup of sliced shallots
1/2 cup sliced carrots
4 T. pork fat
6 T. flour
4 cups beef stock, boiling
2 cups dry white vermouth
salt and pepper to taste
reserved goose parts (giblets and neck), except the liver


Method
1. The sauce can easily be prepared the day before. This is recommended for ease.

2. Chop up the goose parts into small pieces, not bigger than an inch.

3. In a skillet, brown the goose parts in the fat.

4. Stir in the flour and brown slowly for five minutes.

5. Take your mixture off the heat. Blend in the beef stock and the vermouth. Simmer for three hours.

6. Strain sauce through fine strainer.

7. Salt and pepper to taste.

8. If you make the sauce the day before, warm it up prior to serving, and drizzle the sauce over the goose and potatoes at the table.

PART FOUR: The Family Smyth’s Roasted Potatoes

hc3potatoes

Ingredients
4 large Idaho baking potatoes
1 large sweet onion
1/4 lb. Kerrygold salted Irish butter
2 T. olive oil
salt (kosher or sea)
pepper


Method
1. Fill a 3- or 4-quart saucepan about halfway with water. Put on maximum heat to boil and add 2 t. salt.

2. Preheat oven at 400° F.

3. Peel potatoes. Cut tips off. Cut potatoes into slices about 7/8-inch wide so they are all of a uniform thickness.

4. Put olive oil and butter into a 10”x14”x2” glass (not metal) baking dish.

5. Peel the onion and cut into four slices. Place one slice in each corner of the baking dish.

6. When water is boiling, put potatoes into the pot. Meanwhile, put the baking dish in the oven to melt the butter. Do not let it burn.

7. Let potatoes boil for 10 minutes. Then, quickly drain them in a colander.

8. Take the baking dish out of the oven. Place potatoes with the flat side down into the dish.

9. Immediately turn them over so they are buttered on top. Spoon butter over each side to ensure they are well-coated.

10. Sprinkle salt and pepper on potatoes and cook in oven for 25 minutes.

11. Once 25 minutes have passed, turn the potatoes over, spoon melted butter over the potatoes again, and add more salt and pepper.

12. Put the dish back in. I recommend rotating it 180 degrees to account for uneven temperatures inside the oven. Bake for another 25 minutes. They are ready to serve when they are crispy, but not burnt.

13. This dish serves four.

To return to the main article, click here.

The Garden in Winter: Behind the Scenes at the Regenstein Fruit and Vegetable Garden

by Katje Sabin (mamagotcha)

gardenwinter

Late last year, I found myself walking across the lonely grounds of the Chicago Botanic Garden during the first snow of winter. Snowflakes were beginning to drift down and gently cover manicured beds of grass and dirt as I made my way over bridges and through arbors toward my goal: a 3.8-acre island in the northwest corner of the property known as the Regenstein Fruit and Vegetable Garden.

garden1lisa

Having recently embarked upon my own urban gardening adventure, I had decided that it was time to draw from an outside, knowledgeable source, and the Garden’s food-related exhibits seemed to provide the inspiration I sought. I hoped to pick up some tips and techniques, and learn from the staff’s ability to grow and maintain edible plants. 

I arranged to meet a guide, who would show me around and help me get the most out of my visit.

And although the crisp air and swirling snowflakes made me wonder why I hadn’t just sensibly arranged a phone interview, I wasn’t totally alone. Hardy geese skated across the icy lagoon, and garden workers were busy arranging tiny colored lights on the great evergreen tree that had been erected at the end of the esplanade.

The Chicago Botanic Garden

2013 was the first year that the Chicago Botanic Garden saw one million visitors, although I didn’t see any of them that day. This sprawling site is composed of 385 acres on Lake Cook Road, just off the Edens Expressway in Glencoe. It has become a jewel among the metropolitan area’s many cultural resources. Owned by the Cook County Forest Preserve District, open to the public since 1972, and supported financially by 50,000 members (the largest membership of any public garden in the United States), it features 25 display gardens that focus on a wide range of themes. My personal favorites include the walled English garden, the stunning bonsai collection, and the three Malott Japanese Garden islands. But I wasn’t here for these.

garden3nut

Lisa Hilgenberg, the Regenstein Fruit and Vegetable Garden’s lead horticulturalist since 2010, met me near her office in the middle of the fruit and vegetable garden’s island. An energetic woman with short sandy hair, a strong handshake, and a quick smile, she waved me in. I pulled out one of my ears of Glass Gem corn, which I’d brought for her as a token of my gratitude. She immediately recognized it, and seemed delighted at the offering. Then she picked up a mottled pecan with a curled brown husk from her desk. “I found this on my walk this morning; here, you can take it with you,” she said to me.

Read More…

Recipe: Tunisian Couscous with Boulettes

By Kristina Meyer (trixie-pea)

cous cous w-boulletes

Ingredients

For the broth/stew
olive oil
kosher salt
2-3 beef short ribs
1-2 beef shanks with a large marrow bone
1 large yellow onion, thinly sliced
1 T. tumeric
1 T. cayenne pepper
1 cinnamon stick
2 T. coriander seed
1 T. cumin seed
2 T. ras el hanout *
10 black peppercorns
1 head of garlic, peeled and chopped finely
parsley stems from one bunch of parsely, chopped finely
1 poblano, chopped
1 quart chicken stock
2 large carrots, peeled and cut into large chunks
3 celery stalks, cut into large chunks
2 whole chicken legs (leg-thigh quarter)

* a traditional Arabic spice blend common to Muslim and Sephardic cuisines.  Available at The Spice House or most Middle Eastern markets.

For the boulettes
1.5 lbs. ground chuck
about 1 T. kosher salt
1 T. ras el hanout *
1 T. ground coriander
½ T. ground cumin
2 t. ground black pepper
1 T. cayenne pepper
¼ cup flat leaf parsley, finely chopped
1 medium onion, grated into a bowl
8-10 cloves of garlic, finely minced
1 egg yolk
2 large russet potatoes, peeled
2 cups all-purpose flour
large bowl of salty water to soak the potatoes
olive oil

For the chickpeas
1 can of chickpeas
juice of 1 lemon
1 T. harissa
salt to taste

For the parsley sauce
1 bunch of parsley
1 clove of garlic
4-5 T. olive oil
juice of 1 lemon
¼ cup water
salt to taste

For the harissa
4-5 dried ancho chiles
4-5 dried chile de arbol
5 cloves garlic
2 roasted red peppers (pimentos)
1 T. tomato paste
1 T. ground coriander
1 T. ground cumin
2 T. wine vinegar
4 T. olive oil
salt and pepper to taste

For the couscous
4 cups whole wheat couscous
4 T. butter, melted
1 cup hot, salted water (using 1 t. salt)

For the vegetables
5 small carrots, peeled
4 stalks celery, cut into 3-inch pieces
2 large kohlrabi, peeled and cut into 1 ½ inch cubes (may substitute daikon radish)
2 zucchini, cut into 1½ inch rounds
1 head savoy cabbage, cut into 6 wedges
1 large or 2 small butternut squash, cut into quarters
Olive oil
Salt to taste

Method

Allow yourself an entire day to make this dish. Start in the late morning and you can be eating by 7 p.m. This recipe will serve 4-6 people and is easy to scale up for a crowd. Technically you could halve the recipe, but I’m not sure why anyone would – just invite more friends over for dinner!

PART ONE: The broth


short ribs
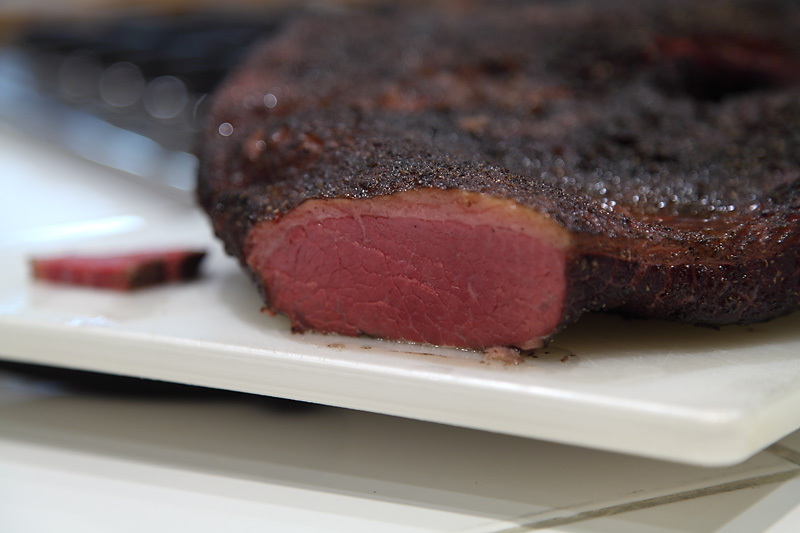
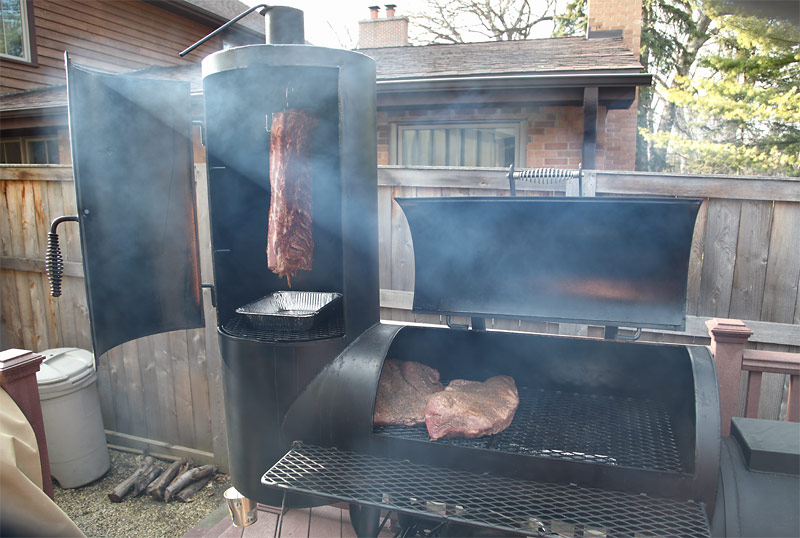
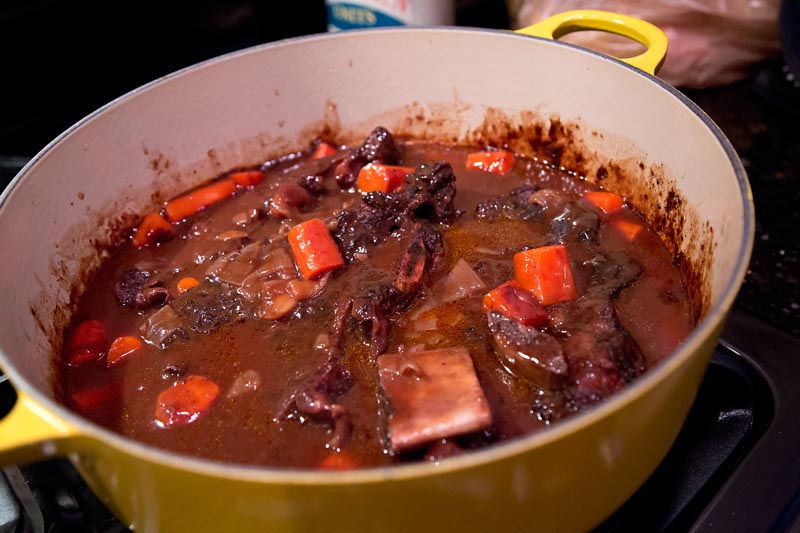
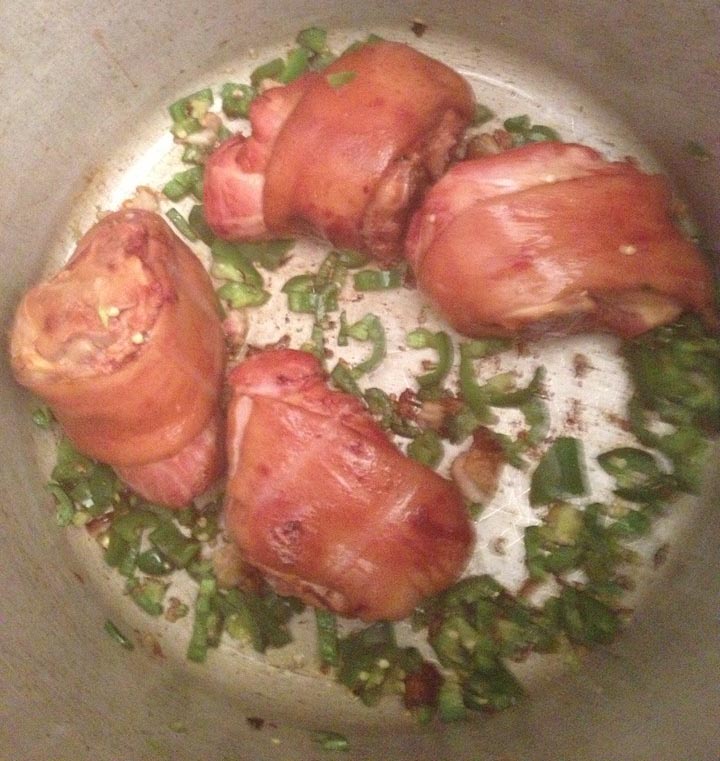
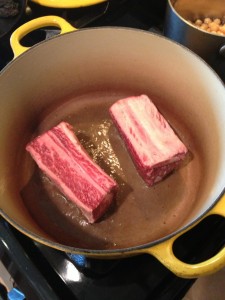
Season the short ribs and shanks generously with salt. Meanwhile, heat a large dutch oven over medium heat. Brown the beef short ribs and beef shanks in olive oil, working in batches so as to not crowd your pan and to achieve a deep brown color on all sides of each cut. Set aside on a platter while you create the flavor base for the stew.

Traditionally, just the shank and maybe some neck bones would be used to flavor the stew. I like to add the short ribs to the recipe for the rich flavor and gelatin they add to the broth, as well as the succulent meat that results. It’s a luxurious addition to the final plate, but with or without them the dish will still be wonderful. If you don’t use ribs, just double up on the shanks.

saute
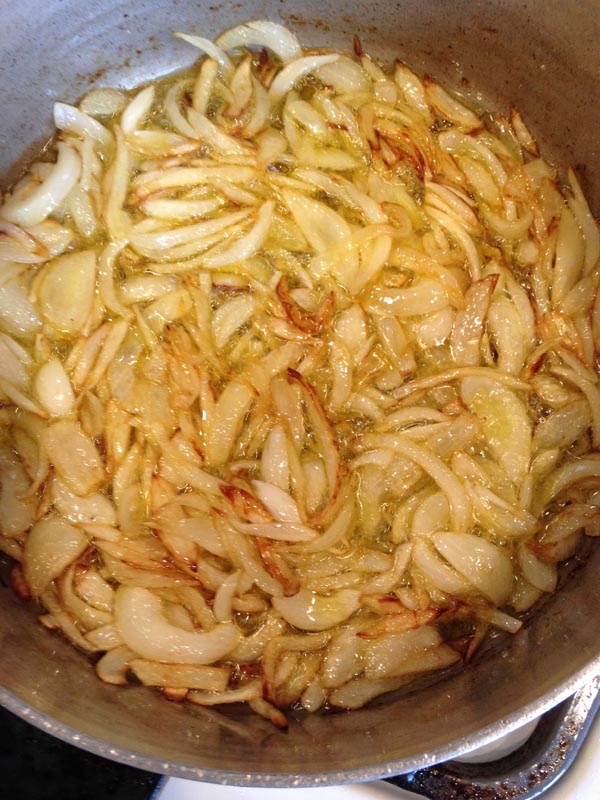
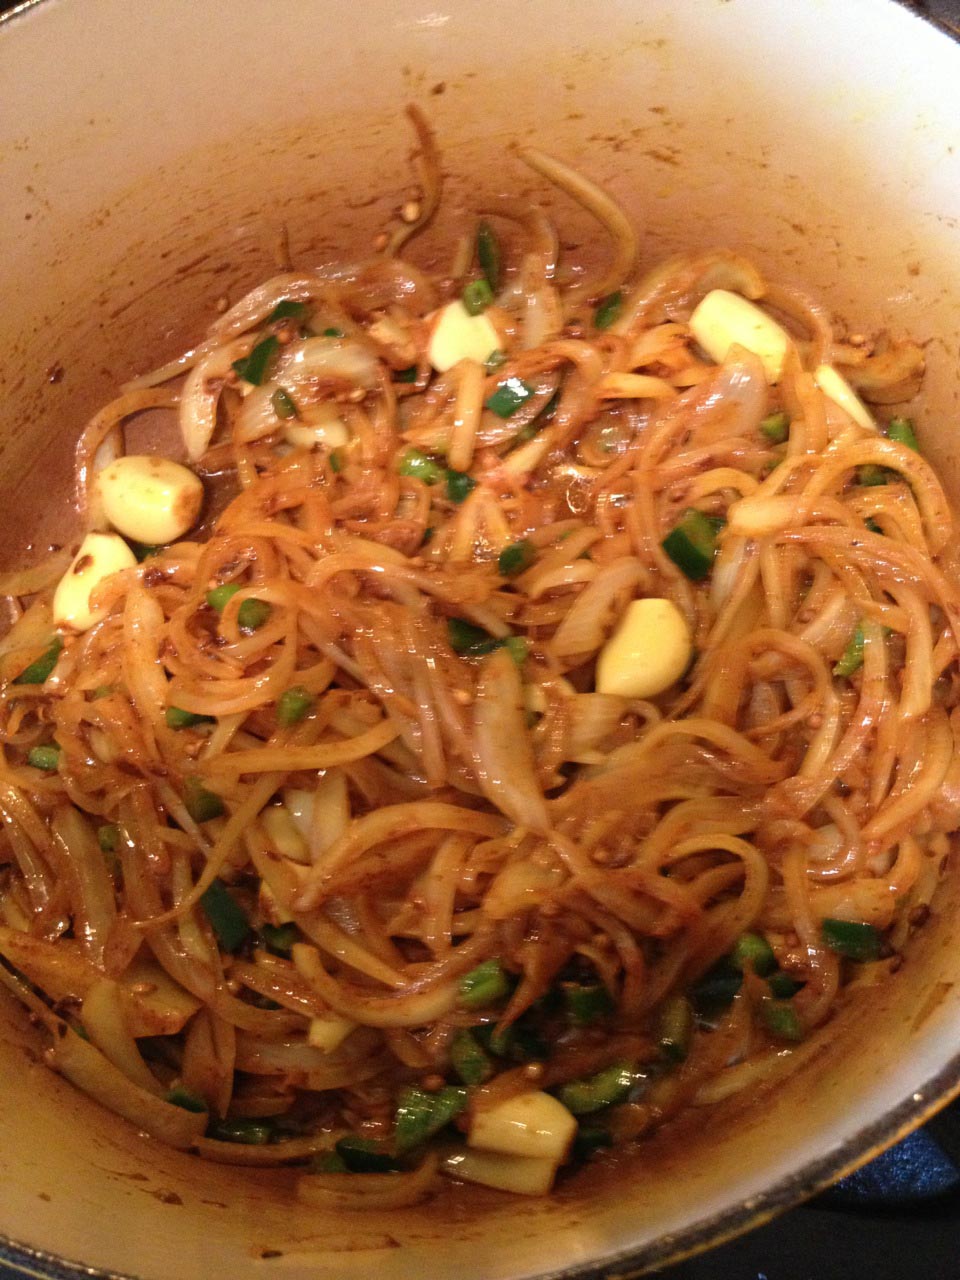
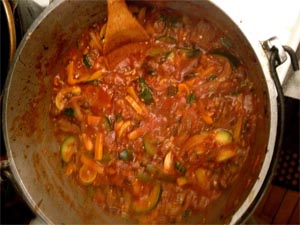
2. In the same Dutch oven, sauté the onions in the beef fat, working to scrape up any brown bits from the surface of the pot. Add a pinch of salt to the onions to help them release their liquid. Add all the spices into the pot and stir to incorporate the spices into the oil. If the pot seems dry, add 1 T. of olive oil to moisten. Once the spices are fragrant, add the tomato paste and fry the paste until it has caramelized and turned a dark reddish-brown. Then add the rest of the aromatics: parsley stems, garlic, green pepper plus 1 T. salt, and sauté until softened.

3. Add 1 quart of chicken stock; scrape up all the bits from the bottom of the pan. Add the two chicken legs, carrots, celery, browned beef shank, short ribs and any juices and fat that have dripped from the beef cuts back to the broth. Return to a simmer.

PART TWO: The boulettes

boulletesWhile the stew is simmering you can make the boulettes – a sort of vegetable-wrapped oblong meatball that is breaded, fried and braised.

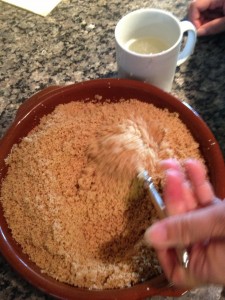
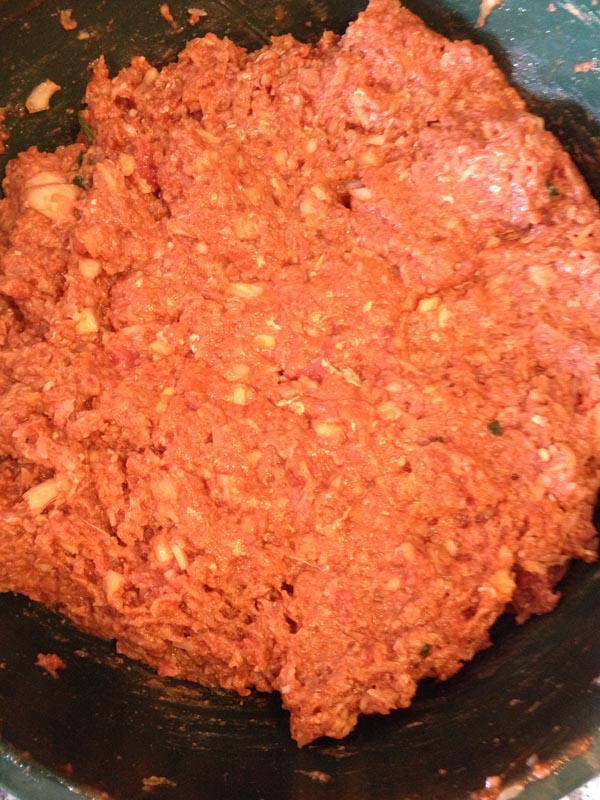
1. Traditionally, the boulettes are made with very coarsely ground or hand-chopped meat. I make them with high-quality ground chuck from the butcher. Keep two key things in mind when you are making the boulettes: first, make sure the meat is properly seasoned; second, do not overwork the meat. In order to accomplish this, take a large bowl and lightly press the ground beef into about a 1-inch layer all around the bowl. This way, as you add the seasonings, you have a better feel for what the correct amount should be.

2. Add seasonings one at a time, evenly distributing the ingredients in layers over the meat. Start with salt, spices, garlic and parsley. Squeeze all of the moisture out of the soaked bread before adding to the meat. You’ll also want to remove all of the “water” from the shredded onion, too. Don’t waste that onion water, though – squeeze all of the onion juice directly into the simmering stew for extra flavor.

3. Add an egg yolk and combine the meat mixture thoroughly with your hands. Be careful to just combine the meat spices without over-mixing – otherwise, your final boulette will have an undesirably smooth texture. Take a small piece of the seasoned meat, microwave it for 10-15 seconds and taste it. Adjust seasonings as needed. As you’ll be braising in a flavorful and reduced broth, which will add additional salt, the meat should taste slightly under-salted. Cover and chill while you prepare the potato wraps.

boulette2
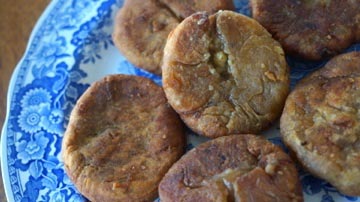
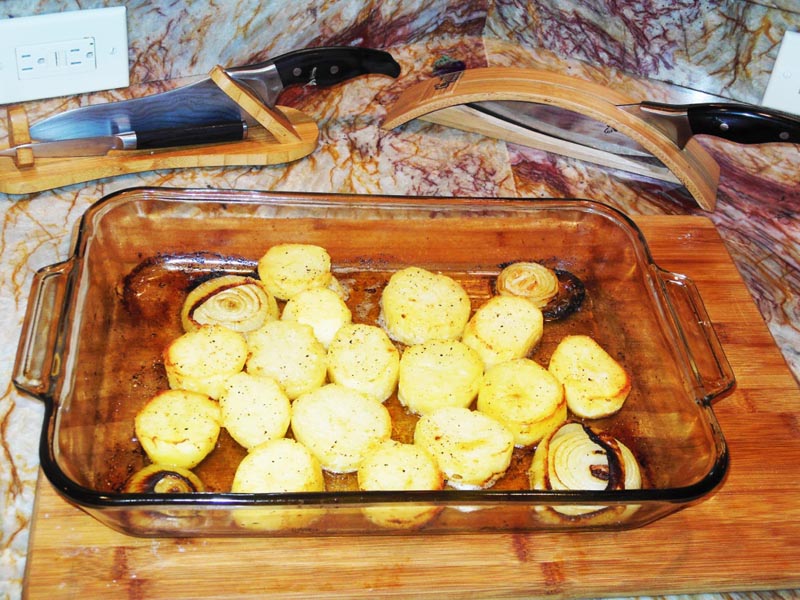
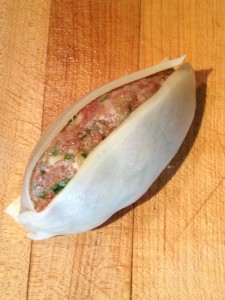
4. This recipe should yield 12-14 boulettes. These football-shaped meatballs are traditionally wrapped in some sort of thinly-sliced vegetable – like eggplant, onion, zucchini, or even celery. 

The preferred wrap in the the Lopata household was potato. The potato browns well, maintains structural integrity and is a great carrier of flavor. Meme and Coco would painstakingly carve each strip of potato by hand with a paring knife. The curvature of their cuts would dictate the shape of their boulette. I figured out a simpler method that yields a more consistent wrap and saves literally hours of work. I use a mandoline to slice the potato into thin sheets, about 1/8-inch thick. The potato sheets need to be soaked in salt water for about five minutes to both season them and make them more pliable. Cut the potato sheets into strips that are approximately 3” long x 1” wide. This doesn’t have to be perfect, but trimming up the strips makes for easier assembly. The chunk trimmings from the potatoes can get thrown into the simmering broth. Do not waste!

5. Before assembling the boulettes, prepare breading and frying “stations” so you are ready to go after the meatballs have been formed. In one bowl, beat three eggs, ¼ cup of water and a pinch of salt. Put about 2 cups of all-purpose flour in another wide, shallow bowl somewhere close to your stove.

6. Remove the meat mixture from the refrigerator and lay it out with your potato strips next to your workstation. To form the boulette, take about 2 ounces of meat (slightly smaller than a billiard ball’s worth) and form it into a torpedo shape, about 3 inches long. Then take a strip of damp potato, lay it on the meatball lengthwise and press it in slightly so that it adheres to the meat. Apply two more potato strips, leaving about a ¼-inch of meat ball exposed between strips.

boulletes3
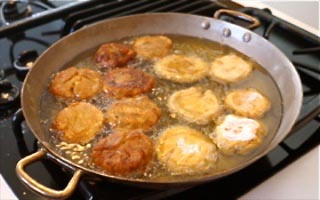
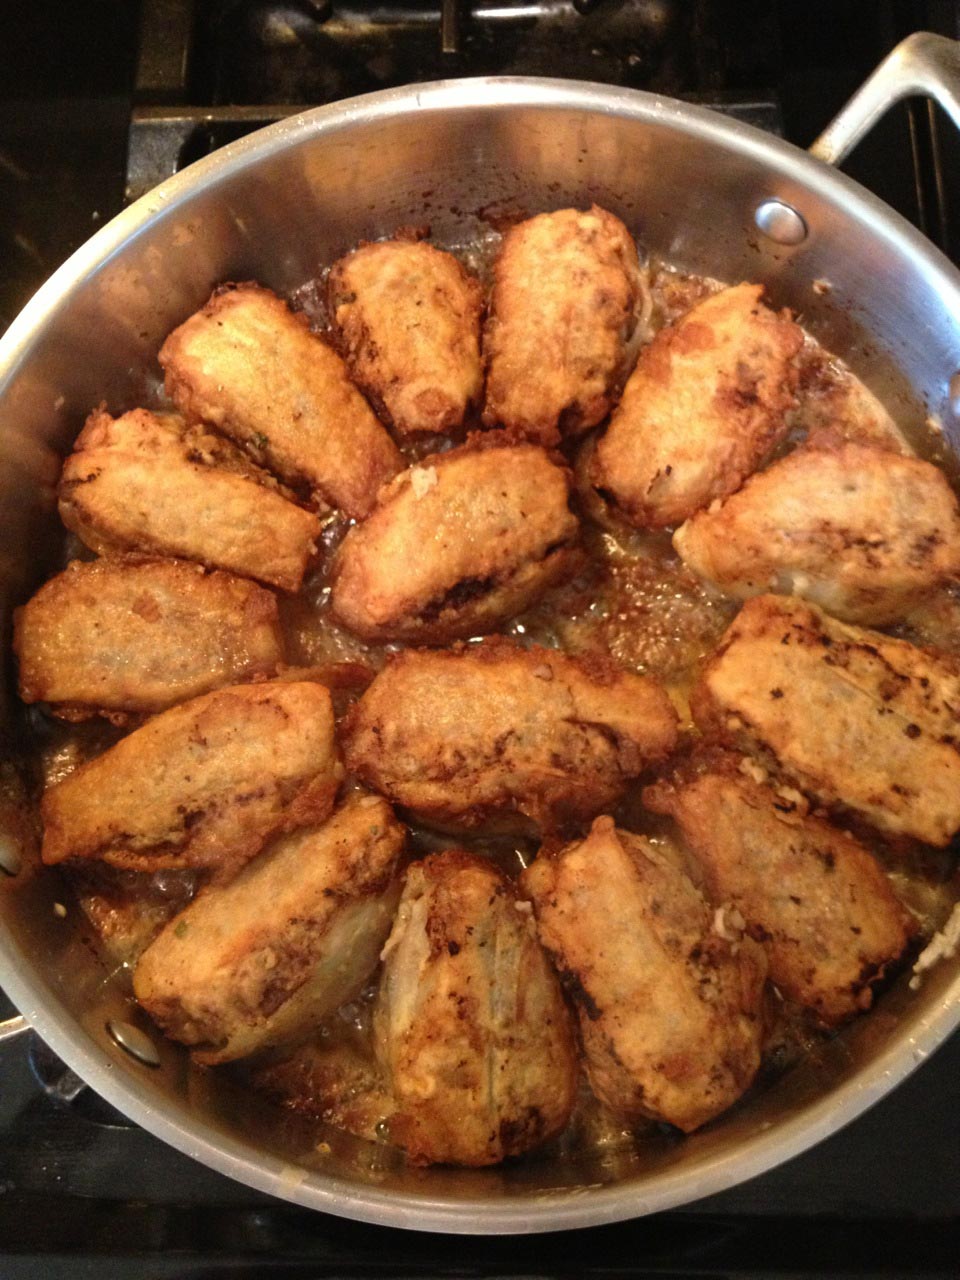
7. Prepare a large, shallow pan with a lid. It needs to be about 16-18 inches wide in order to hold all of the boulettes at once for the braise. Heat ½ cup of olive oil over medium-high heat. Since pan size will vary, make sure there is a generous amount of olive oil. Working in 2-3 batches so the boulettes have room to brown (not steam) in the pan, coat each in flour (do not shake off too much of the excess flour), then dip it into the egg mixture and place it directly into the sauté pan. Pan should sizzle but not smoke when you add each one. Adjust heat as necessary. Continue to brown on all sides until golden brown. Remove, reserve.

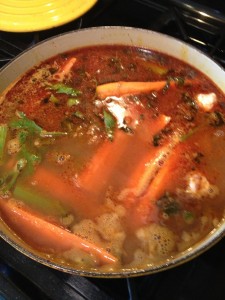
8. When finished, add them all back to the pan so they are packed in fairly snugly – touching, but all in a single layer. Add all residual juices as well. Turn heat to medium-high and as soon as they start sizzling, add about 1½ cups of the stew broth directly into the pan. The liquid should come about ¼-inch up the side. Reduce the heat to medium-low and simmer partially covered, until the liquid has reduced to a deep mahogany “gravy” – about one hour, maybe slightly longer.

This is the part of the process where you need to have faith, or temporarily adopt it if you don’t already have some. The first time you do this, you will not believe that the the meatballs are going to stay together, and you definitely won’t believe that the potato wrapper will remain attached through the braise, but boulettes are small miracles both in engineering and flavor. Do not fret!

At this point most of the hard work is done.  Your broth is starting to taste really good. This is also a good time to take a break. Clean up your kitchen, have a glass of wine or a smoke. When you come back, you’ll start the final phases of couscous – vegetables, legumes and condiments!

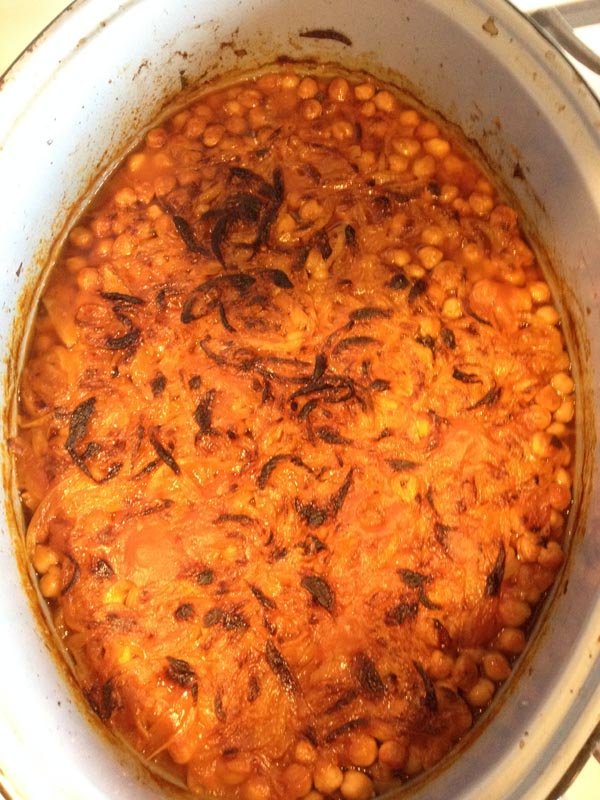
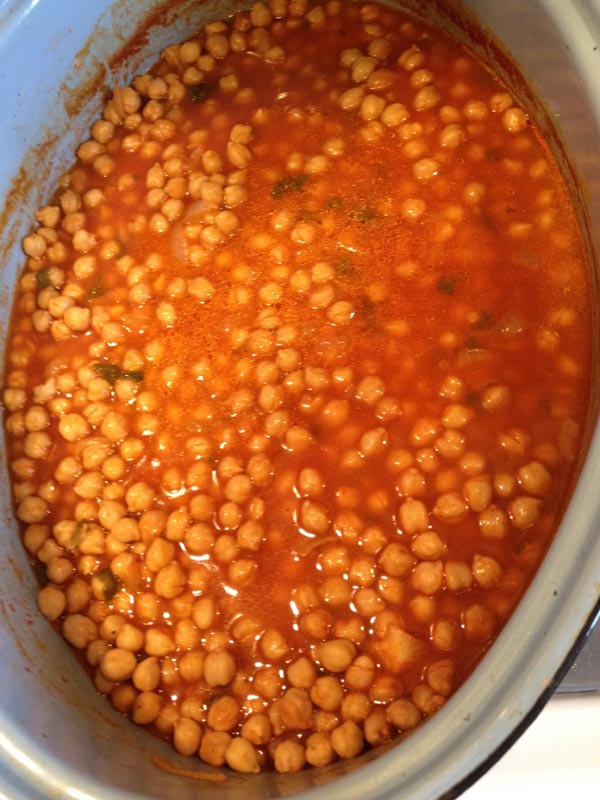
PART THREE: The chickpeas


Take a can of chickpeas and ladle most of the beef fat that has surfaced on the stew over the chickpeas. Simmer for about an hour. The chickpeas will absorb the flavor of from the spiced fat. Before serving add the juice of one lemon, a tablespoon of harissa and salt to taste.

PART FOUR: The condiments


dry toastedThe two condiments involved are harissa, a Tunisian hot pepper sauce, and a totally made-up parsley sauce that I improvised a few years back. The latter adds back a little freshness and acidity to the final dish and the former provides spice and richness. If you like it a little spicier, try leaving some of the seeds in the chiles. 
Traditionally, salty preserved lemons were always served alongside the meal. If you are using a food processor, which I recommend, make the parsley sauce first, and then you don’t even have to wash out the processor bowl before you begin the harissa.

1. In a food processor or blender, combine parsley, garlic, olive oil and salt. Blend until smooth, add water until it makes a smooth and pourable sauce, about the consistency of a creamed soup – though a little chunky is fine. Cover and set aside.

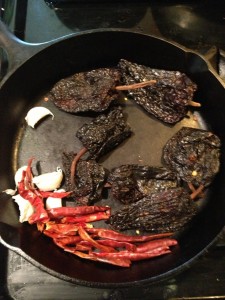
2. Over medium heat, toast chile peppers in a dry skillet until fragrant and pliable, about five minutes. Also, heat the garlic cloves through, with their skins still on. in the same skillet. Meanwhile, bring about 1 cup of water to a boil.  When chiles are toasted, cut them open with kitchen shears and remove the stems and seeds. Place the de-seeded chiles in the boiling water, turn off the heat and cover. Let steep 10 minutes.

3.  In the bowl of the same food processor or blender you used to make the parsley sauce, add the chiles, peeled garlic, tomato paste, roasted red peppers, spices, salt, and vinegar. Blend until smooth. Taste and adjust for seasoning.  Add olive oil to thin to desired consistency.

PART FIVE: The couscous


cous w-waterPreheat the oven to 350° F. Place the couscous in a earthenware or ovenproof dish and pour the melted butter on top. Massage the butter into the pasta until each granule is coated with fat. Heat 1 cup of water with 1 t. salt until very hot. Sprinkle this salty water over the buttered couscous to moisten the pasta. Place it in the oven to steam-roast. Check on its progress every 15 minutes or so, mixing and adding water if necessary. The couscous is done when it is soft enough to bite through, but it should still have some fight left in it.

Using the whole-wheat couscous gives the dish a nuttier flavor, closer to the bulgur wheat that was used once upon on a time. It’s difficult to overcook. Once couscous is done (30-40 minutes), cover and keep warm in the oven.

PART SIX: The vegetables


veg for stockstock
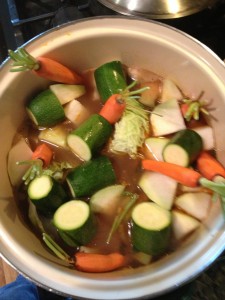
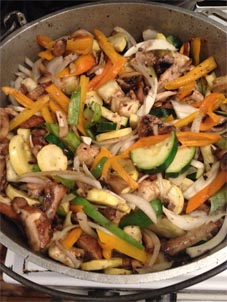
Transfer the stew to a large stockpot and bring to a boil. Remove short ribs and set aside for service. Taste the broth. It should be rich and slightly salty. Adjust seasoning. Add your vegetables and enough water to almost cover them. It’s okay if some of them are sticking out of the top of the liquid. 

Cover and boil until done, about 20-30 minutes. You do not want your vegetables to be toothsome; they should be very soft – cut-with-a-spoon soft. Let the vegetables rest in the broth until ready to serve. Re-adjust the seasoning to make sure the broth tastes like a savory soup.

PART SEVEN: Service!

I feel sorry for anyone who didn’t grow up with some sort of boiled dinner – i.e. corned beef and cabbage, crawfish boils, pot au feu, cocido. As bland as they sound on paper, these are some of the most flavorful, soul-satisfying dishes imaginable. Couscous is no exception. Once the spices permeate the vegetables, they transform into something brand new.

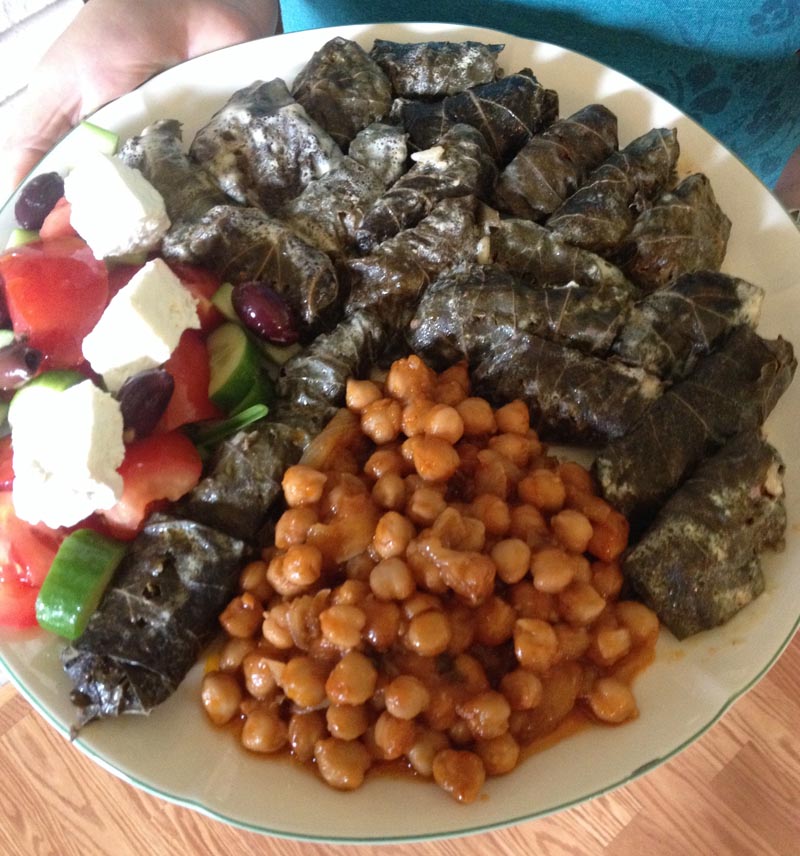
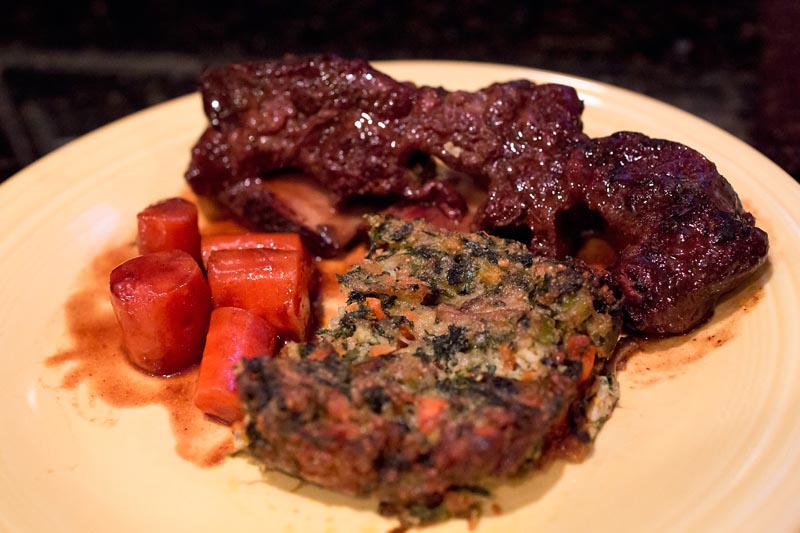
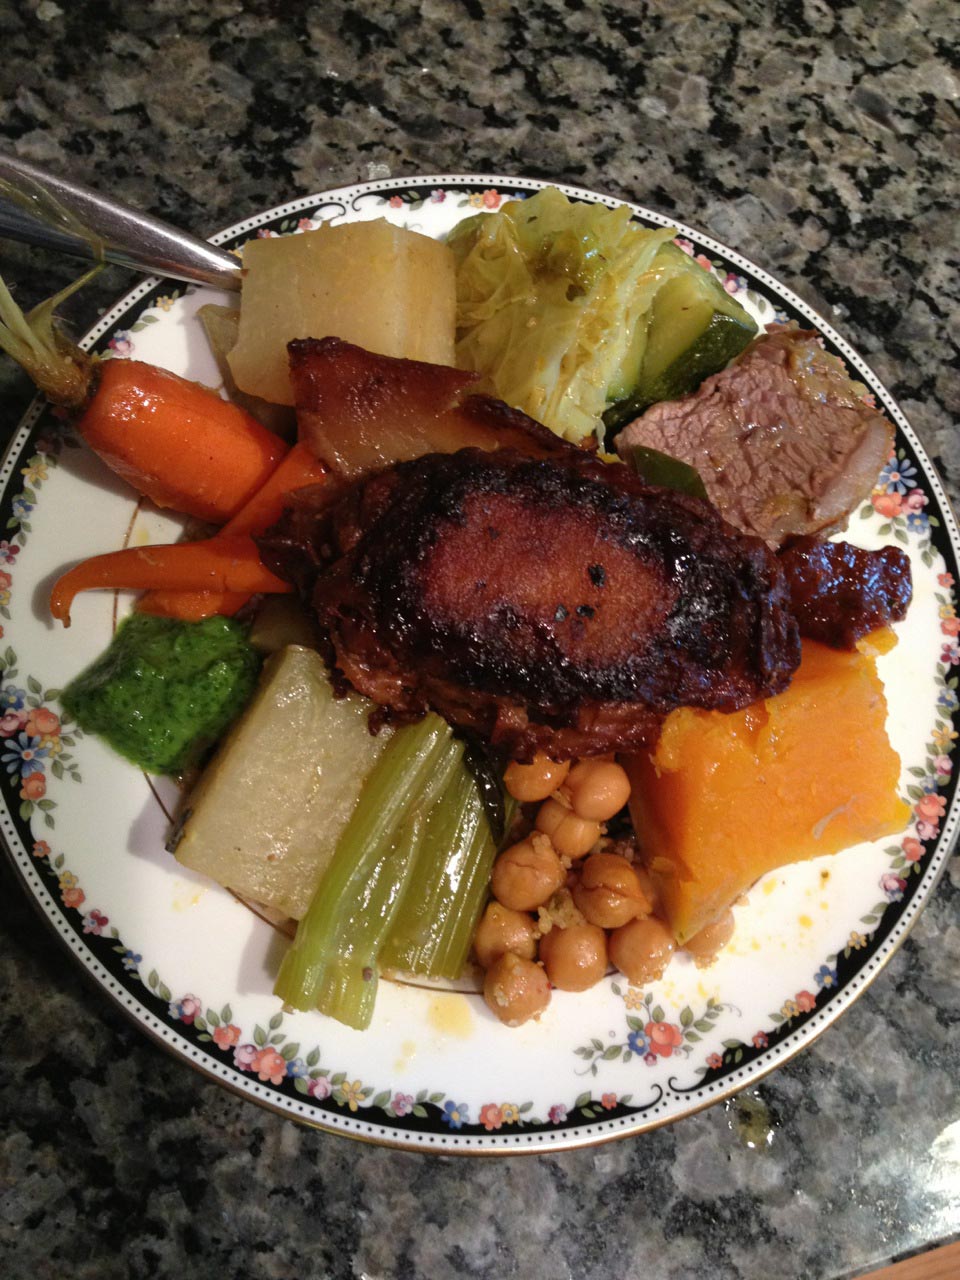
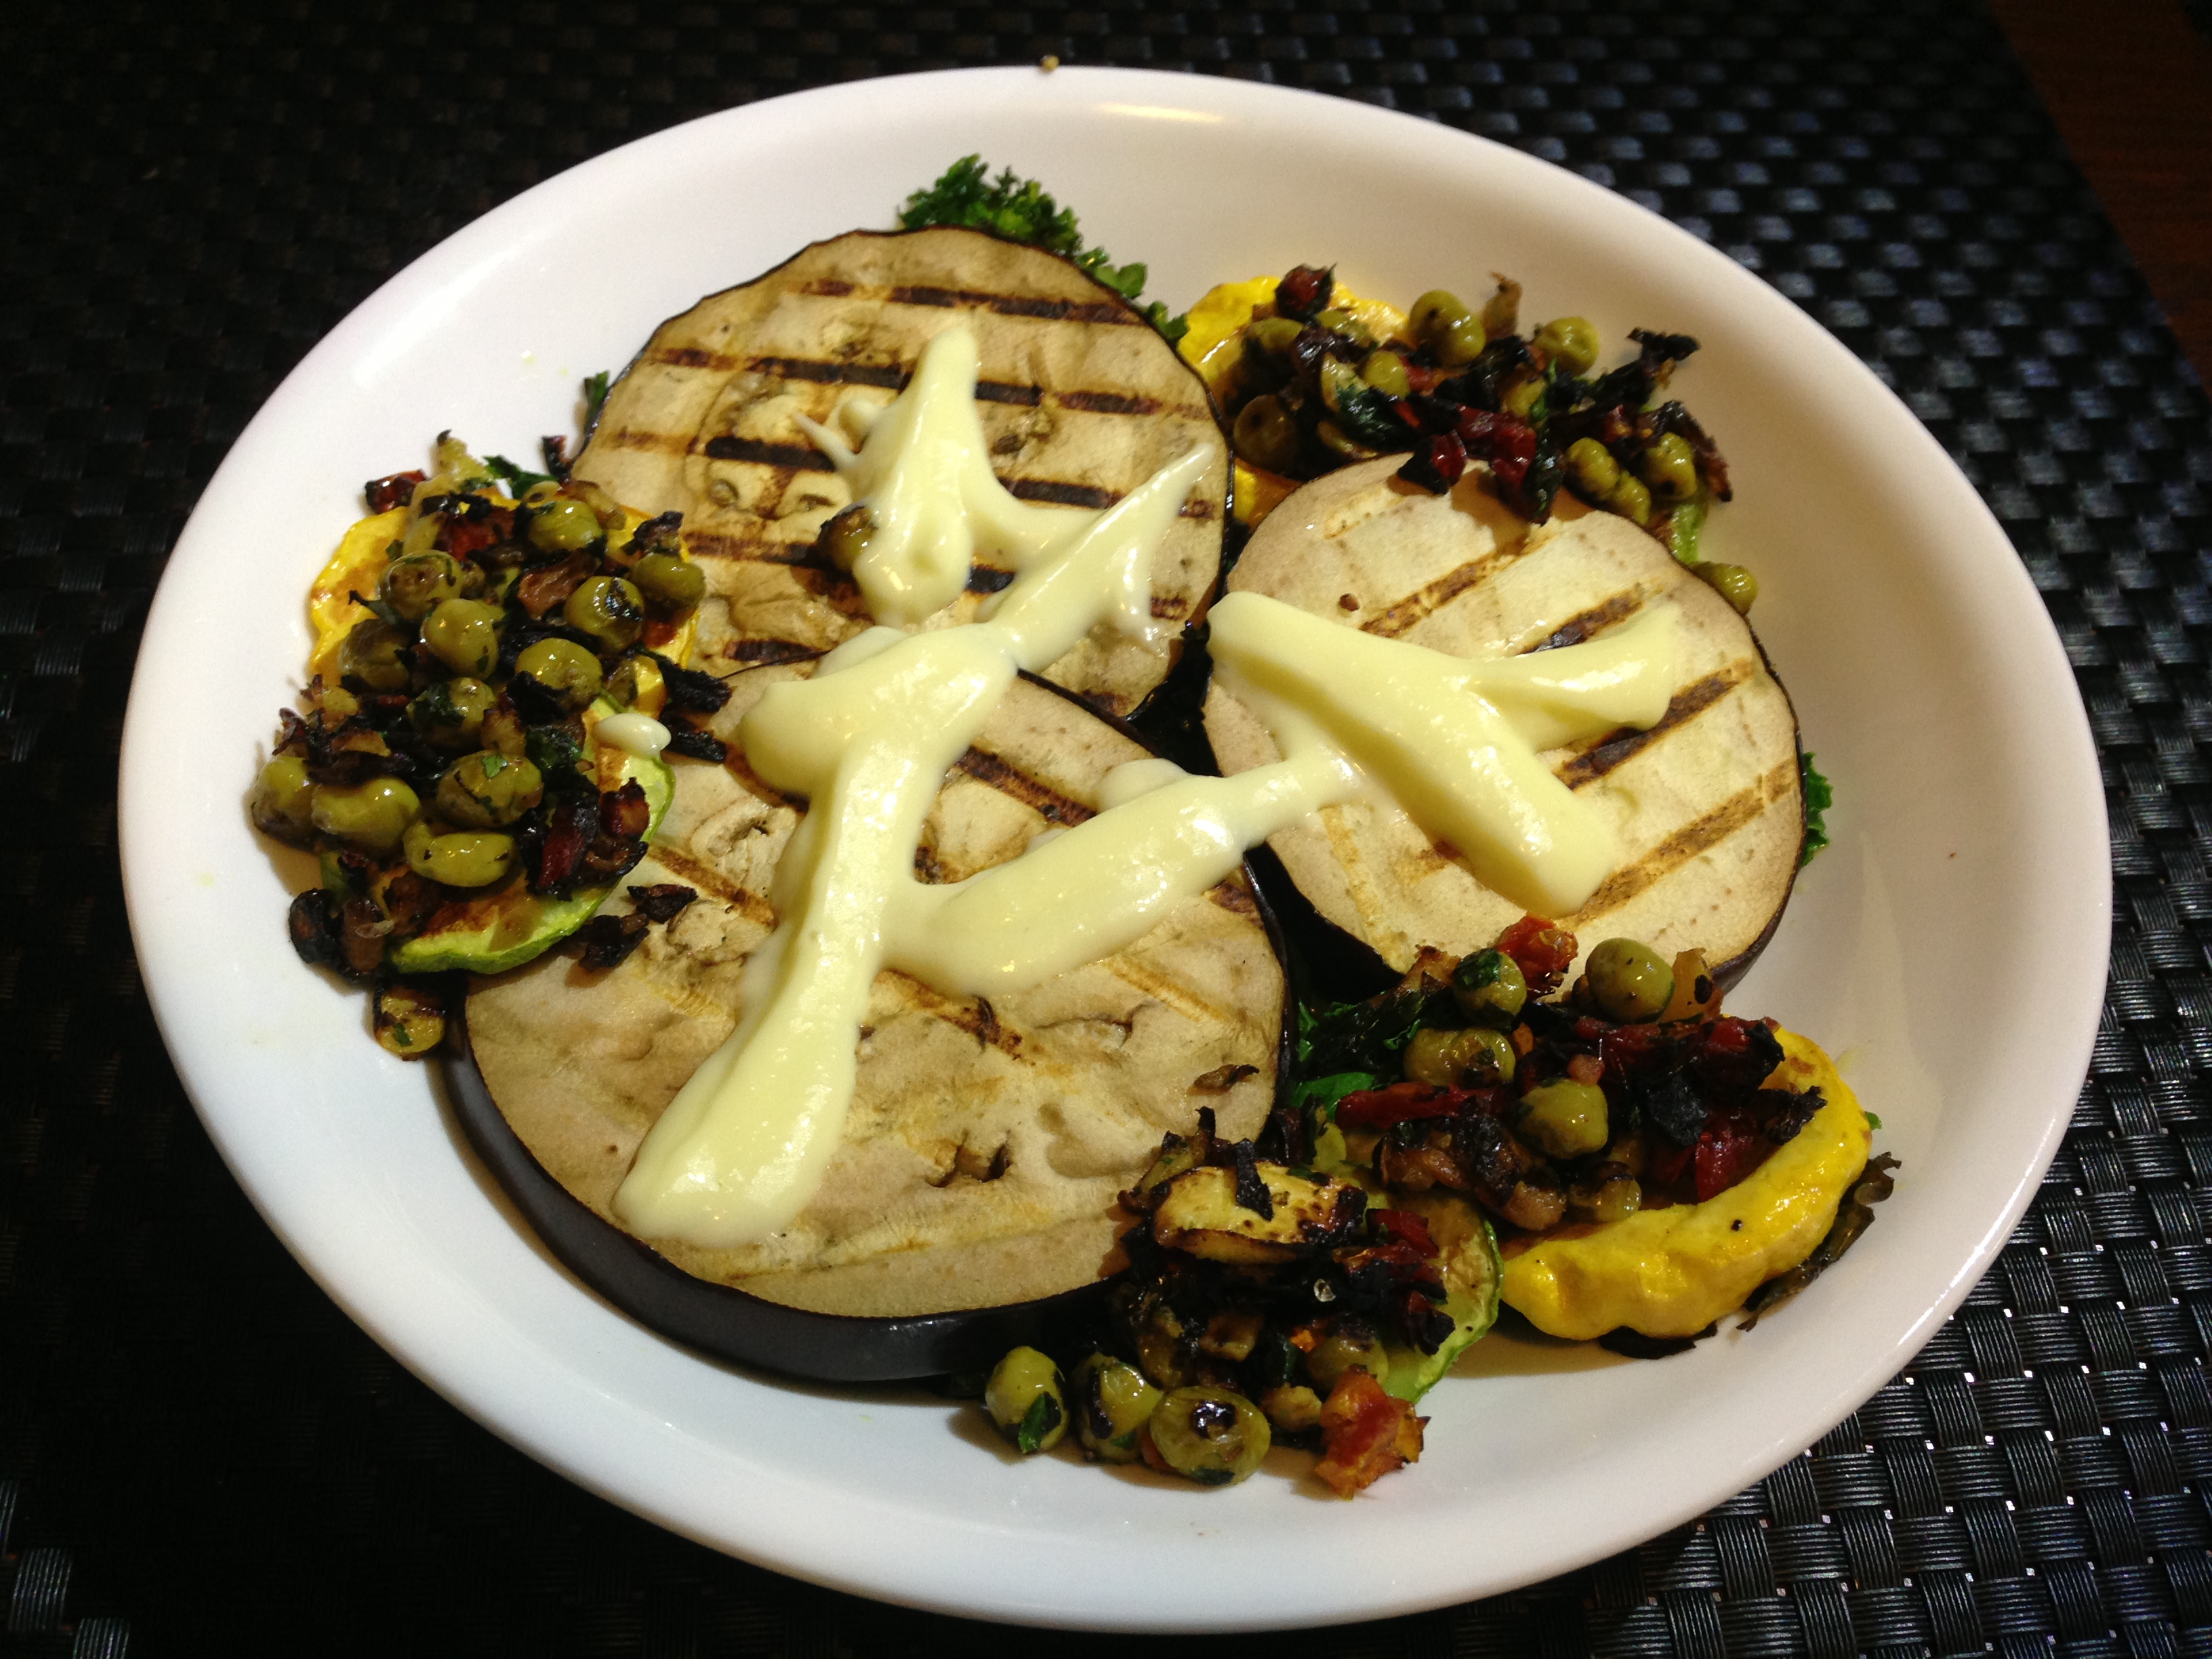
Remove the vegetables from the broth and lay out on a platter. Drizzle a little olive oil over the vegetables and season with a few pinches of coarse salt. The broth can be served in a terrine so diners can moisten their bowls of couscous as they like. Trim and slice the short ribs and lay out on a platter with the shank meat and boulettes.

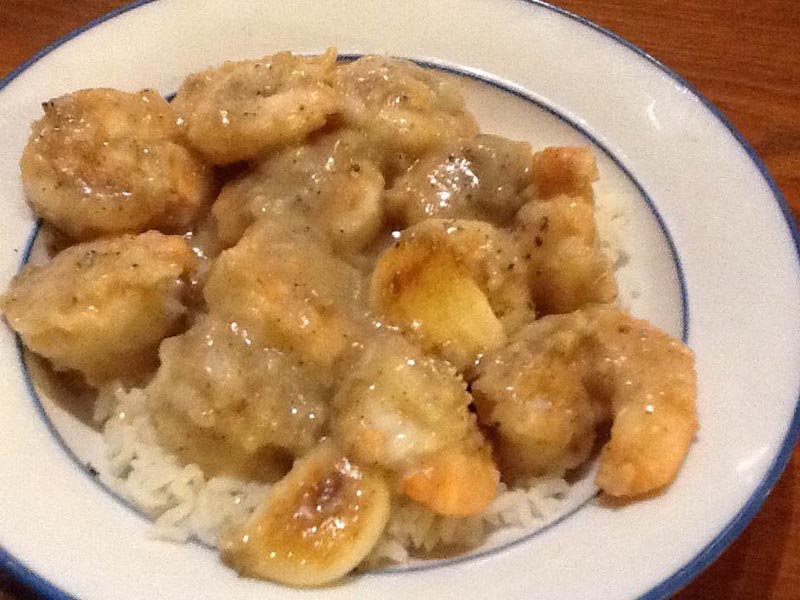
In a wide, shallow bowl place a small mound of couscous. Moisten the couscous with ¼ cup of broth. Place a few pieces of each vegetable, chickpeas, short rib and a boulette on top. Garnish with parsley sauce and harissa and eat it in good health.

To return to the main article, click here.

Home Cookin’ Part 2: Kristina Meyer (trixie-pea)

By Alan Lake (jazzfood)

trixie w-accoutraments
Editor’s Note: This article is the second in a series by Alan Lake, all about home cooks, their stories and recipes. Read  part one here for a description of what Home Cookin’ is all about.

Alan Lake: Intro

When I think who in my life best represents the spirit I hope to encapsulate in this series, one name leaps to mind: trixie-pea, a.k.a. Kristina Meyer.

We’re connected, she and I, and think we both knew it the minute we met. Over the years I’ve been the recipient of numerous trixie-pea throw-downs. Not many people I know can pull off an elaborate Burmese picnic the way she recently did, putting together a spread of nearly a dozen dishes at a remote, outdoor location. And maybe none of those involved could tell how authentic it was, but one thing we did agree upon was just how effing fabulous it all tasted. Like everything she makes.

Read More…

Eating and The Beautiful Game: Top-Notch U.K.-Style Scarfing for Soccer

By Kari Lloyd (apopquizkid)

arsenalfootballfans

It’s often been said that America and the U.K. are two nations divided by a common language. The Brits say “football,” we Americans say “soccer.” We say “tomato,” they say… er… “tomato.” Though a worldwide passion since the Stone Age, U.S. sports fans have only begun to embrace “the beautiful game” called soccer, particularly the teams of the English Premier League.

The origins of modern-day soccer are said to have sprouted up in England in the 1800s, and the eating traditions surrounding the game are almost as deep and rich as the history of the game itself. While we here in the U.S. tend to stick with our wings and hot dogs no matter what sport we’re viewing, soccer games are a good opportunity to bask in a cultural exchange of sorts.

Read More…

Jewels from the Garden: The Story Behind Carl’s Glass Gems

By Katje Sabin (mamagotcha)

glassgem
The picture that started it all.

In May of 2012, the above photo of an ear of corn featuring astonishingly psychedelic colors made the rounds on the Internet. “NOT PHOTOSHOPPED!” blared the blogs. Being a rainbow aficionado myself, I briefly toyed with the idea of tracking down the seeds of this marvelous grain so I could grow it, but I didn’t yet have a dedicated garden space. Besides, it wasn’t yet commercially available.

drugcorn
These arrived in a plain, unmarked envelope.

Later that year, I dug out three little 4’x4′ garden boxes in my backyard, with permission from my landlord, and started dreaming about what to grow in it. The tiny amount of the fabulous corn seed available for the year was already sold out from the only company legitimately selling it, but I decided to take my chances with an eBay seller. Finally I had my hands on a tiny Ziploc baggie filled with a few dozen nondescript nuggets of what looked like run-of-the-mill Indian corn.

The whole episode had a slightly…ahem…seedy feel to it. I really had no idea where this corn had come from. The seller was new, and I wondered whether I’d let myself be ripped off, but there were no more seeds to be found and I decided to take the gamble. I planted them in May of 2013 and crossed my fingers.

Read More…

Italian Journal: A Tale of Two Classes

By Jay Martini (jnm123)

image1city

For my 30th wedding anniversary, I wanted to prove that there was more to the planet than New York City or Las Vegas. I wanted to bust preconceptions and welcome the unexpected.

So my wife and I did Italy – or, more specifically, as much of Italy as one can do in eight days. For years, I had been regaled with stories from friends and business colleagues about the history, the paintings, the cathedrals, the sculptures, but mostly the food. The food!  My goodness, the way they went on about what they consumed over there, I enviously began to think that some new series of tastes and flavors had been discovered. And while I thought I was a pretty decent cook of all things Italian, I had always wondered what was lost in the translation from there to here. So, we wanted the focus of the trip to be a couple of cooking classes.

After exploring websites and finding guided culinary adventures online, my wife and I eventually decided – with a certain amount of trepidation – to go it alone. We chose, for our first class, the exotic semi-tropical island of Sicily. And then we chose a second class in Chianti, the better to experience diverse regional cooking within the same country.

Read More…

Home Cookin’ Part I: Alan Lake (Jazzfood)

By Alan Lake (Jazzfood)

frontalan
Son of Lolita and author’s best friend, holding Lolita’s Lasagna

In my 30 years of being a chef, searching the world for the finest foods and collecting the most interesting recipes to inspire my craft and satiate my belly, I’ve discovered that many of my favorite meals have been in homes, not restaurants – inspired meals served from the heart, with food that resonates on many levels besides “delicious.”

Food often produces a response similar to sex: sensual pleasure. Food provides for basic human needs that can be shared without impropriety or (in most cases) guilt. In fact, these days the word orgy is more commonly associated with food than sex, as in food orgy – at least, among my circle of friends.

And we all have someone special in mind when we think of certain dishes or occasions. Along with my father, who was not a cook but a dedicated glutton, two others significantly shaped my culinary proclivities early on: Lazlo and Lolita.

Read More…

Recipe: Lolita’s Vegetable Lasagna

By Alan Lake (Jazzfood)

lasagna1Ingredients:

  • 1 large eggplant, cubed
  • 2 lbs. mushrooms, sliced
  • 1 green bell pepper, sliced
  • 2 red bell peppers, sliced
  • 2 yellow peppers, sliced
  • 1 large onion, sliced
  • 2 large zucchini, sliced
  • 2 yellow squash, sliced
  • 1 fennel bulb, sliced
  • 3 garlic cloves, sliced thin
  • 12 oz. crushed tomatoes with juice
  • 1 bunch basil
  • 16 slices of Provolone cheese
  • 2 oz. Parmesan cheese
  • 1 lb. lasagna noodles

Method:

lasagna21. In a large pot, mound all vegetables and pour in 1 cup of olive oil and salt and pepper; toss.

2. Cook down until all vegetables are soft.

3. Add crushed tomatoes and basil and simmer 10 minutes.

4. Adjust seasonings.

5. In the meantime, cook lasagna noodles in salted and oiled water to al dente, drain and shock in cold water.

6. Add 2 oz. of the pasta water to the vegetables.

7. Oil casserole dish lightly with olive oil.

8. Spread 1 1/2 cups of the vegetable mixture on bottom.

lasagna39. Layer with lasagna noodles.

10. Spread 2 cups of vegetables over noodles.

11. Place eight slices of Provolone over vegetables.

12. Repeat the layers ending with vegetables.

13. Sprinkle with Parmesan.

14. Bake in 400-degree oven for 30 minutes or until lightly browned.

Back to Home Cookin’ Part I: Alan Lake (Jazzfood)

Alan Lake a.k.a. “Jazzfood” a.k.a. “The Garlic Chef” has been a globetrotting professional chef for three decades and has won numerous awards, professional competitions and distinctions. He’s also the author of The Garlic Manifesto, a book about the history of garlic going back to 10,000-year-old Neolithic caves that contains facts, fiction, folklore, artwork, recipes, professional insights, quotes etc. – think Mark Kurlansky’s Salt or Cod, but a bit more personal. He’s been a musician since he was a child and coined the term “Jazzfood” to describe his cooking style as “solid technique based upon tasteful improvisational abilities.” He views his food as he does his music and writing and has been known to bust a pout if any of them are subpar in any way. 

Recipe: Mess-O-Greens

By Alan Lake (Jazzfood)

collards1Ingredients:

  • 5 lbs. collard greens – stem/rib removed, triple-washed by lifting greens out of water and placing in colander (not by draining dirty water and removing after the fact)
  • 4 ham hocks
  • 1 large jalapeño – chopped w/seeds
  • 4 oz. white wine vinegar
  • 3 oz. honey
  • 2 oz. olive oil
  • 2 qt. chicken stock or as needed to cover
  • salt and pepper to taste

Directions:

1. Sauté ham hocks and jalapeño in olive oil in a pot over medium high heat for three minutes.

collards22. Add honey and vinegar; bring to a boil. Reduce to a simmer, stirring to fully incorporate for three minutes.

3. Add 1 quart of chicken stock to the pot and bring to a boil.

4. Add washed greens a little at a time. Greens should wilt until fully incorporated. Add additional chicken stock as needed to cover.

5. Season with salt and pepper.

6. Bring to a boil, reduce to simmer for three hours; adjust seasoning throughout. Greens should be more sour than sweet, with the spice in the background. Adjust vinegar, honey and jalapeño if needed.

7. Remove ham hocks from heat, take meat off. Chop and return the meat to the greens.

Back to Home Cookin’ Part I: Alan Lake (Jazzfood)

Alan Lake a.k.a. “Jazzfood” a.k.a. “The Garlic Chef” has been a globetrotting professional chef for three decades and has won numerous awards, professional competitions and distinctions. He’s also the author of The Garlic Manifesto, a book about the history of garlic going back to 10,000-year-old Neolithic caves that contains facts, fiction, folklore, artwork, recipes, professional insights, quotes etc. – think Mark Kurlansky’s Salt or Cod, but a bit more personal. He’s been a musician since he was a child and coined the term “Jazzfood” to describe his cooking style as “solid technique based upon tasteful improvisational abilities.” He views his food as he does his music and writing and has been known to bust a pout if any of them are subpar in any way. 

A Mad-Town Chowdown

By Titus Ruscitti (Da Beef)

     titus1

There are as many good things about Chicago as there are residents here. As I was coming back from a trip to Texas recently, I realized that one of the things I liked so much was the fact you can drive two or three hours from the city limits and end up in another state. It’s not as quick as rolling up and down the east coast, but our central location allows for some great weekend escapes.

Check out Da Beef’s slideshow of all the great places he mentions in Madison – and a few more. Are you hungry yet?

Slideshow

Because I’m a food and drink aficionado, Madison, Wisc. is one of my favorite of these escapes. I might be a little bit biased, having spent my college days there jumping around enjoying the atmosphere of a school that’s often ranked near the top as far as happiness goes. I was just a Spotted Cow/Jäger Bomb/Jack and Coke kid back then. A lot has changed – but almost all of the good remains.

Read More…

More or less meatless: Or, how I became a flexitarian

By Erin Fagan (efa23)

image (8)
Grilled eggplant and sautéed kale with Lebanese garlic sauce
garnished with stuffed pattypan squash

Aside from my ardent declarations of love for bacon, I usually keep my eating habits private. I don’t run around telling people what I will and won’t eat as a matter of courtesy. If you invite me to dinner, I’ll eat just about anything you put in front of me. So when I finally do get to choose what I would like to eat and ask for a vegetarian meal, some of my associates are often puzzled. “When did you become a vegetarian?” is a common question I hear. I usually have to correct people. “I’m not a vegetarian; I’m a flexitarian.” Inevitably, this revelation is met by a puzzled expression. So I explain.

Read More…

In a pickle: What’s up with green relish?

By Katje Sabin (mamagotcha)

katjerelish

When I first landed on the Northwest Side four years ago, my sister quickly planned a trip to visit Chicago for the first time. And one of the ways she and I get our bearings in a new place is to dig in to the traditional foods of the area. So, naturally, our first foray into my new hometown’s offerings included a pilgrimage to Superdawg.

There was also much sampling of pizza, Italian beef, giardiniera, and — Chicago being the largest Polish-populated city outside of Warsaw — a healthy dose of pierogies and paczki. But the one item she chose to make room for in her luggage on the return trip? A jar of the neon-green Chicago-style sweet relish that had adorned her hot dog.

Read More…

The biscuit rose de Reims: A traditional French treat

By David Hammond (David Hammond)

Rose biscuit, courtesy David Hammond(1)

Some food items are so particular to a region that they’ve become edible icons representing a tradition and a way of life – points of personal identification for residents, almost as sacred as a national flag. One of these, out of France, is the beautifully-colored biscuit rose de Reims, or rose biscuit.

Rose biscuits have been produced in Reims, France, since 1691. Once, dozens of bakeries made them, but production took predictable hits during World Wars I and II. Now, the only remaining producer of rose biscuits in Reims is Maison Fossier.

Read More…

Banchan: Learning to appreciate Korean side dishes

By Kristina Meyer (trixie-pea)

baechu kimchi [napa cabbage]
baechu kimchi, made with Napa cabbage

I am a Seoul-born American; I was adopted when I was a wee thing and came to Chicago before I was six months old. Raised in a white, Midwestern suburban family, my only exposure to Korean culture were annual Korean adoptee picnics and the occasional trip to the late Bando restaurant on Lawrence Avenue or Sam-Mee in Lakeview. My folks would order chap chae and fondly watch me eat bulgogi and kimchi like I was an exhibit. Genes, they’d say – that’s why she likes it.

These familial dining scenes are great memories and stand in such stark contrast to my adult experiences, now that ajummas (ladies of a certain age) at any Korean eatery greet me with “Annyeong haseo!” as I walk in. I either answer back and get a string of questions in a language I don’t understand, or feel guilty for not being more Korean and fight the urge to explain why. Sorry, Korea! No hard feelings, though – it doesn’t mean I won’t enjoy my meal. Especially my banchan.

Read More…

In Search of the Jim Shoe

By Peter Engler (Rene G)

intro-shoosign

People eat differently on the South Side. If you don’t believe that, try to find a Mother in Law, Big Baby, or Freddy north of Madison Street.

Another sandwich, also likely unfamiliar to most Northsiders, is currently spreading around the South Side and beyond.

Ten or fifteen years ago I found a menu from a South Side sub shop slipped into my front gate. It listed all the familiar local treats: subs stuffed with beef (either “roast” or “corn”); gyros (usually pronounced GUY-ro); and super tacos (ground beef, lettuce, and tomatoes, all folded into a pita). But there was also a sandwich I’d never heard of then: the Jim Shoe.

In the next few years I would notice that name on menus or window signs of other sub shops. Clearly the Jim Shoe wasn’t found at only one or two places. After I had completed an initial investigation into the Mother-in-Law (a tamale with chili, usually served on a hot dog bun), I decided to take on the Jim Shoe. Where did it originate? How did it get that peculiar name? Little did I know that after nearly a decade and dozens of Shoes, I’d still be asking those same questions.

Read More…